Art is a universal language, but for children with special needs, the tools and methods of expression often require thoughtful adaptation. This guide moves beyond generic advice to provide a comprehensive roundup of eight distinct, actionable, and inclusive art activities for special needs children, designed for successful and empowering creative experiences. We will explore everything from multi-sensory exploration and adaptive tools to rhythm-based projects and digital art, offering practical examples and specific tips for parents, educators, and therapists. The goal is to celebrate every child's unique abilities and foster meaningful artistic expression.
To truly foster a child's artistic potential, it's valuable to understand how different neurodevelopmental profiles can influence creative expression. For instance, exploring the link between ADHD and creativity can provide deeper insights into channeling focus and energy into art.
For structured activities, consider starting with coloring. Simple, bold lines can be an excellent entry point for developing foundational skills. Using chunky crayons or adaptive grips makes the activity more accessible, helping to build fine motor control and confidence before moving on to more complex projects outlined in this list. This guide provides the insights needed to facilitate joyful and engaging art sessions for every child.
1. Sensory Art Activities (Multi-Sensory Exploration)
Sensory art engages multiple senses simultaneously, making it one of the most effective art activities for special needs populations. It focuses on the creative process rather than the final product, providing a low-pressure environment perfect for individuals with autism, intellectual disabilities, or sensory processing disorders. The goal is to explore creativity through touch, sight, sound, smell, and even proprioception (the sense of body position).
This approach provides a safe outlet for self-expression while helping with regulation and sensory integration. By interacting with various textures and materials, participants can develop fine motor skills, improve focus, and reduce anxiety in a calming, therapeutic setting.
How to Implement Sensory Art
Successful sensory art depends on careful planning and offering choices. A well-organized space with clearly defined stations can prevent participants from feeling overwhelmed.
- Tactile Fun: Use materials with distinct textures. Finger painting with pudding, sculpting with scented dough, or adding sand to paint creates a rich tactile experience. Actionable example: Create "texture paint" by mixing sand, salt, or coffee grounds into different colors of paint. Have the child paint on a thick piece of cardboard, allowing them to feel the different gritty sensations as they spread the color.
- Visual and Auditory Elements: Incorporate vibrant, high-contrast colors. For sound, try painting to the rhythm of calming background music or using tools like jingle bells on a paintbrush. Actionable example: Fill a clear plastic bottle with water, oil, and glitter to create a "sensory bottle." The child can shake it to see the colors and glitter swirl, providing visual stimulation without mess.
- Smell and Taste: Add food-grade essential oils like lavender or citrus to playdough, or use edible paints made from yogurt and food coloring for a taste-safe activity.
Actionable Insight: Always pre-test materials for potential sensory sensitivities. What is calming for one child may be overstimulating for another. Have a variety of options available and respect a child's choice to opt out of a particular texture or scent. For instance, if a child dislikes the stickiness of finger paint, offer a paintbrush with a long handle as an alternative.
Practical Tips for Success
- Create a Calm Environment: Minimize distractions. Use soft lighting and keep the art area organized and uncluttered.
- Offer Choices: Let participants choose their materials, colors, and tools. This empowers them and increases engagement.
- Use Visual Schedules: A simple visual schedule showing the steps of the activity (e.g., "1. Put on smock," "2. Choose paint," "3. Paint on paper," "4. Wash hands") can help manage expectations and reduce anxiety.
- Allow Processing Time: Avoid rushing. Give individuals ample time to explore each material at their own pace without pressure to "finish" a project.
Sensory art is an adaptable and powerful tool. For more ideas on how to incorporate therapeutic elements into creative time, you can explore additional art therapy activities for children on colortada.com.
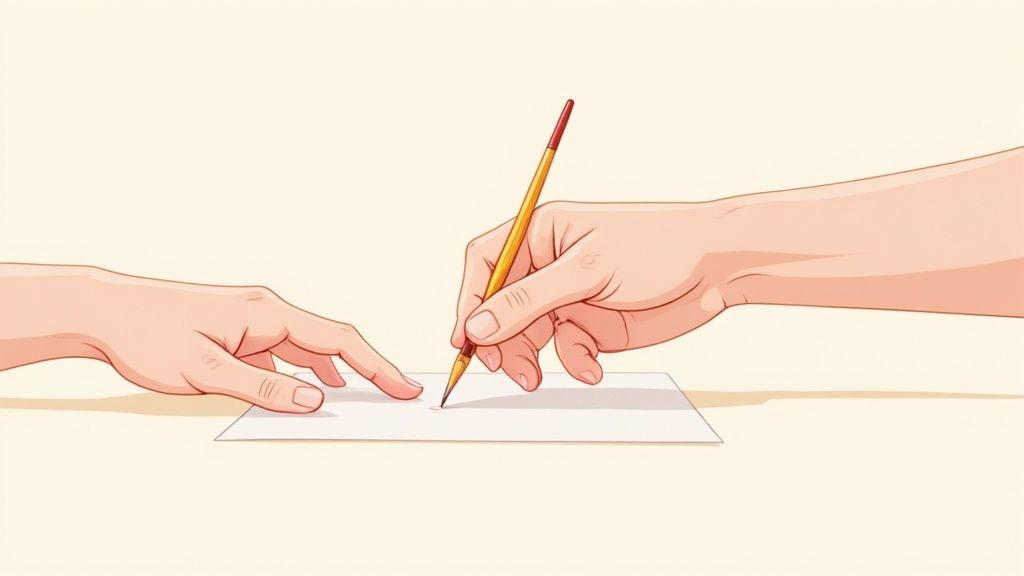
2. Hand-Over-Hand Art Instruction
Hand-over-hand instruction is a physical guidance technique where an instructor or caregiver gently places their hands over the learner's to guide them through an artistic motion. This method is one of the most supportive art activities for special needs, particularly for individuals with significant motor disabilities, limited mobility, or developmental delays. It focuses on kinesthetic learning, allowing the participant to feel the movement of creating a brushstroke or holding a crayon correctly.
This approach builds muscle memory, improves motor planning, and provides the necessary support for individuals to participate in activities they might otherwise find inaccessible. By sharing the creative process, it fosters a deep sense of connection and accomplishment, turning potential frustration into a successful and enjoyable experience. The goal is to gradually reduce support as the individual gains confidence and control.
How to Implement Hand-Over-Hand Art
Effective hand-over-hand guidance is built on trust, respect, and clear communication. The technique should always feel supportive, not restrictive, adapting to the individual’s specific needs and comfort level.
- Painting and Drawing: Gently guide the hand to hold a paintbrush or marker. Start with large, sweeping motions to paint a background before moving to smaller details. This helps build foundational motor skills.
- Coloring Pages: When coloring, use this method to demonstrate how to stay within the lines or apply even pressure. For example, guide their hand in a circular motion to fill in a large shape, offering verbal encouragement like, "Great job keeping the color smooth." Coloring Advice: Start with coloring pages that have very thick, dark outlines. This provides a clear visual and physical boundary, making it easier to feel when the crayon has gone "outside the line."
- Modeling and Sculpting: Use the technique to show how to roll, pinch, and shape clay or dough. The tactile feedback is immediate and helps the learner understand the cause and effect of their movements. Actionable example: To teach how to make a ball of clay, place your hands over the child's and guide them in a circular, rolling motion on the table, saying "roll, roll, roll" to connect the word to the action.
Actionable Insight: Always ask for permission before initiating physical contact. Use simple language like, "May I help guide your hand?" This respects the individual's autonomy and builds a trusting, cooperative relationship. If the child resists, try modeling the action beside them first before attempting physical guidance again.
Practical Tips for Success
- Start with Gentle Pressure: Begin with light, supportive guidance. Pay close attention to the individual’s cues and adjust pressure accordingly.
- Pair with Verbal Cues: Narrate the action as you do it. Say, "We are making a long, straight line," or, "Let's dip the brush in the blue paint."
- Fade Support Gradually: As the person gains skill, slowly reduce your physical support. You might move from hand-over-hand to just guiding their wrist, then their elbow, until they can create independently.
- Celebrate the Process: Focus on the effort and participation, not just the final product. Every mark made is a step forward and should be celebrated to build self-esteem.
This technique is a powerful tool for inclusion, ensuring everyone has the opportunity to express themselves creatively. For a visual demonstration of this supportive method, watch the video below.
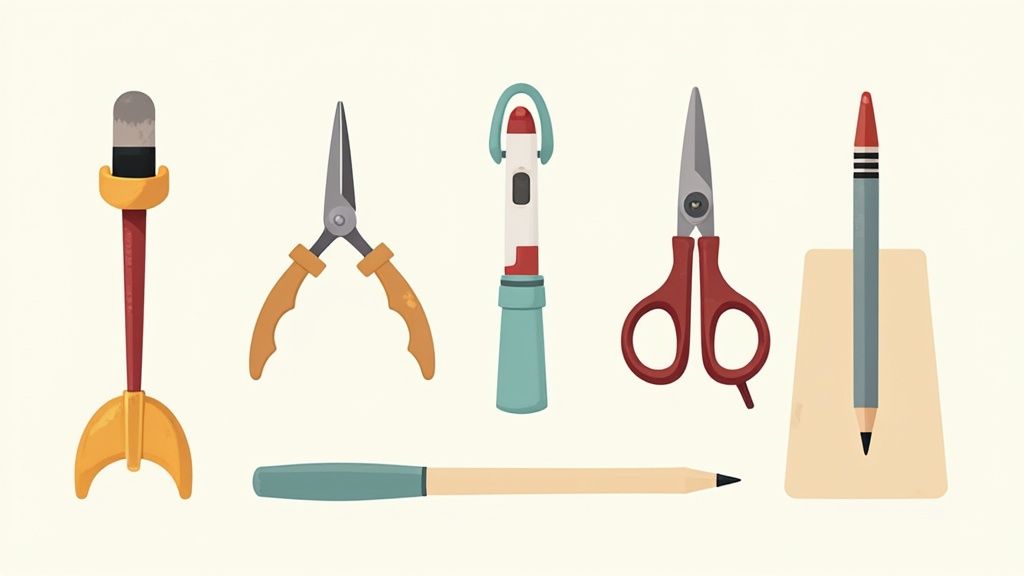
3. Adapted Art Tools and Adaptive Equipment
For many individuals, the primary barrier to artistic expression isn't a lack of creativity but a physical challenge in manipulating standard art supplies. Using adapted tools is one of the most empowering art activities for special needs populations because it removes these physical obstacles. This approach focuses on modifying the tools rather than the activity, enabling individuals with limited hand function, fine motor difficulties, or conditions like cerebral palsy to participate fully and independently.
The goal is to provide equipment that accommodates specific physical needs, allowing the artist to focus on their creative vision. From ergonomic grips that reduce strain to weighted utensils that stabilize hand movements, these tools foster independence, boost self-esteem, and make art accessible to everyone. They are a practical application of assistive technology that directly supports creative engagement. For a broader understanding of how various tools support learning, you can explore the topic of assistive technology in education.
How to Implement Adapted Art Tools
Success with adaptive equipment hinges on matching the right tool to the individual's specific needs. It often involves a process of trial and error to discover what works best for a person's unique motor skills.
- Improve Grip and Control: Use chunky crayons, oversized paintbrush handles, or add-on pencil grips. A universal cuff can be invaluable, allowing someone with limited grip strength to hold a brush or marker securely. Actionable example: For a DIY solution, wrap foam hair curlers or pipe insulation around the handles of paintbrushes or markers to create a thick, easy-to-hold grip.
- Enhance Stability: For individuals with tremors, weighted utensils or weighted wrist cuffs can provide the proprioceptive feedback needed to steady hand movements. Anti-slip mats placed under paper can also prevent it from sliding.
- Adapt Cutting and Coloring: Adaptive scissors with spring-action handles reduce the effort needed for cutting. Coloring Advice: For coloring, try using paint sticks or bingo daubers. They require minimal pressure to release vibrant color and are excellent for filling in large areas without the fine motor strain of a crayon or colored pencil.
Actionable Insight: Involve an occupational therapist (OT) in the tool selection process whenever possible. Their expertise can help identify the most effective and appropriate tools for an individual's specific motor challenges. If an OT is not available, observe closely: if a child is pressing too hard or too soft, a weighted tool might help. If they struggle to hold on, focus on grip enhancers.
Practical Tips for Success
- Assess Individual Needs First: Observe the specific motor challenges. Does the person struggle with gripping, pressing down, or coordinating movements? This will guide your tool selection.
- Offer a Variety of Options: Present several types of grips, brushes, or scissors. Let the individual try them out to see which one feels most comfortable and effective.
- Combine Adaptive Strategies: Don't rely on just one tool. You might combine a weighted cuff with a universal grip and an angled drawing board to create a fully supportive art station.
- Introduce Tools Gradually: Avoid overwhelming the artist with too many new items at once. Introduce one tool at a time and allow them to get comfortable with it before adding another.
4. Digital and Technology-Based Art (AAC and Computer Art)
Digital and technology-based art leverages computers, tablets, and specialized software to unlock creative potential, making it an essential category of art activities for special needs. This approach is particularly transformative for individuals with significant motor impairments or communication disabilities. It bypasses physical limitations by using tools like touchscreens, eye-tracking programs, and switch-activated software, allowing for artistic expression that might otherwise be impossible.
This technological medium offers a powerful avenue for self-expression, especially for non-verbal individuals using Augmentative and Alternative Communication (AAC) devices. By integrating art creation with their communication systems, users can make choices, give commands, and produce complex visual work. It fosters independence, boosts self-esteem, and develops crucial digital literacy skills.
How to Implement Digital and Technology-Based Art
Effective implementation focuses on matching the right technology to the individual’s abilities and providing adequate support. The goal is to make the technology feel like a natural extension of their creative intent.
- Tablet and App-Based Art: Use intuitive apps like Procreate on an iPad, which can be paired with styluses or hand-held grips. Many apps offer simplified interfaces and features like "snap-to-shape" to assist users with motor control challenges. Actionable example: The app "Tayasui Sketches School" has a very simple interface with large icons for tools and colors, making it easy for beginners to navigate and create.
- Switch-Activated Painting: For individuals with limited mobility, switch-activated software allows them to paint by pressing a button or switch. The program cycles through colors or brushstrokes, and the user makes selections with a simple action.
- Eye-Tracking Technology: Advanced eye-gaze systems enable users to control a cursor with their eye movements. This technology can be used to draw, paint, and select colors in specialized art programs, offering incredible creative freedom.
Actionable Insight: Technology should be an enabler, not a barrier. Start with simple, cause-and-effect art apps to build confidence before introducing more complex software. For example, apps where a simple touch creates a starburst or a sound can be a great introduction to touchscreen interaction. Regular calibration of tools like eye-trackers is crucial for a frustration-free experience.
Practical Tips for Success
- Customize Accessibility Settings: Explore the built-in accessibility features on tablets and computers. Adjust touch sensitivity, enable guided access to prevent exiting an app, and use screen readers if needed.
- Provide Structured Training: Introduce new technology and software in short, patient sessions. Use visual guides and allow plenty of time for practice and exploration without pressure.
- Combine Digital with Traditional Media: Print out digital creations. Use the printouts as a base for traditional coloring, painting, or collage to create a multi-media project that bridges both worlds.
- Have a Backup Plan: Technology can fail. Always have a non-digital alternative ready to go in case of software crashes, battery issues, or other technical difficulties.
Digital tools offer endless possibilities for creativity. For engaging digital options that are simple to start with, you can explore some fun animated coloring pages from colortada.com.
5. Adapted Painting and Drawing (Large-Scale, Modified Surfaces)
Adapted painting and drawing modifies traditional art-making to overcome physical barriers, making it an excellent choice among art activities for special needs. This approach uses oversized tools, large-scale surfaces, and alternative techniques to accommodate motor planning difficulties, spatial awareness challenges, and limited attention spans. By focusing on gross motor movements rather than precise fine motor control, it reduces pressure and builds confidence.
This method is particularly effective for individuals with physical disabilities or developmental delays, as it encourages full-body engagement and creative expression. Using vertical easels, window painting, or large floor canvases can also improve posture, core strength, and visual tracking in a fun, engaging way.
How to Implement Adapted Painting and Drawing
Success with this approach comes from providing the right tools and environment to support creative freedom. The focus is on enabling expression without the frustration that conventional small-scale art can cause.
- Go Big with Surfaces: Swap standard paper for large rolls of craft paper on the floor, an upright easel, or even a washable wall or window. These surfaces encourage big, sweeping arm movements.
- Adapt Your Tools: Use chunky paintbrushes, rollers, or sponges that are easier to grip. Actionable example: Use a small paint roller from a hardware store for rapid, satisfying coverage of large areas. This is great for making backgrounds and requires only a simple back-and-forth motion.
- Choose Forgiving Materials: Water-based, washable paints are ideal. Chalk markers on windows or dry-erase boards are also fantastic, as they allow for easy "do-overs," which reduces performance anxiety.
Actionable Insight: Vertical surfaces like easels or windows naturally encourage better posture and shoulder stability. This position helps develop the foundational motor skills needed for other tasks, like writing, by strengthening the core and upper body. Taping paper to a wall is a simple way to achieve this without an easel.
Practical Tips for Success
- Prioritize Safety and Cleanliness: Use non-toxic, washable paints and provide protective aprons. Set up in an easily cleanable area to minimize stress about messes.
- Offer a Rich Palette: Provide a variety of vibrant paint colors to choose from. This empowers participants and makes the activity more visually stimulating.
- Encourage Collaboration: A large mural project can be a wonderful group activity. It fosters teamwork, social skills, and a shared sense of accomplishment.
- Display the Artwork: Celebrate every creation by displaying the finished pieces. This validates the artist's effort and builds self-esteem.
6. Collage and Cut-and-Paste Art (Adapted Scissor Work)
Collage and cut-and-paste activities are fantastic art activities for special needs because they prioritize composition and creative expression over precise drawing skills. This method allows individuals to create complex and visually rich artwork by arranging, tearing, and gluing various materials. It is particularly effective for those with fine motor challenges or low confidence, as it shifts the focus to color choice, spatial arrangement, and texture.
This approach builds decision-making skills and enhances visual-spatial awareness in a low-pressure environment. By selecting and placing pre-cut shapes or torn paper, participants can express themselves freely, creating everything from vision boards to abstract compositions without the frustration of needing perfect lines.
How to Implement Collage Art
Success with collage art lies in providing accessible materials and focusing on the assembly process. The key is to reduce barriers so that creativity can flow freely.
- Tear-and-Paste: Provide colorful tissue paper, construction paper, or magazine pages for tearing. This action is a great motor skill exercise and requires no sharp tools. Actionable example: Create a "torn paper landscape." Draw a simple horizon line on a piece of paper. Have the child tear strips of blue paper for the sky and green or brown paper for the ground and glue them on.
- Pre-Cut Materials: Offer a wide variety of pre-cut shapes, textures, and images. Think fabric scraps, foam shapes, stickers, and buttons. This allows participants to jump straight into the composition phase.
- Adapted Cutting: For those working on scissor skills, use adaptive scissors (loop scissors or spring-loaded scissors). You can also draw thick, bold lines on paper for them to follow, making the cutting target easier to see and manage.
Actionable Insight: The beauty of collage is its limitless potential for adaptation. If glue is a challenge, use self-adhesive foam shapes or contact paper (sticky side up, taped to a table) where items can be placed without needing glue. If arranging small pieces is difficult, use larger cutouts from magazines or catalogs.
Practical Tips for Success
- Offer Abundant Choices: Set up "creation stations" with bins of different materials sorted by color, texture, or theme to inspire creativity.
- Use Glue Sticks: For a less messy and more controlled application, provide large glue sticks or glue sponges instead of liquid glue bottles.
- Provide a Template: Offer a simple outline, like a shape of an animal or a house, to give participants a starting point for placing their materials.
- Celebrate Composition: Praise choices related to color combinations, placement, and layering. This reinforces their creative decision-making and builds confidence.
Collage is a powerful tool for developing dexterity and creative thinking. To discover more ways to support skill development through art, you can find helpful strategies to improve fine motor skills on colortada.com.
7. Rhythm, Movement, and Music-Based Art (Kinesthetic Expression)
Integrating rhythm, music, and physical movement into art-making transforms the creative process into a full-body experience. This is one of the most dynamic art activities for special needs because it channels energy productively and links emotional expression with physical action. This kinesthetic approach is ideal for individuals with ADHD, autism, or emotional/behavioral disorders who often learn and express themselves best through movement.
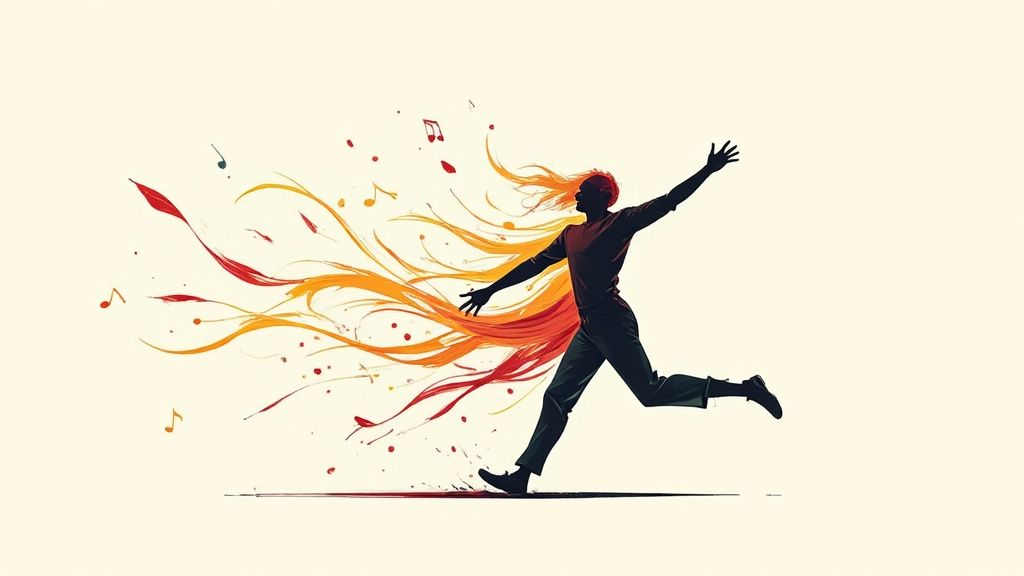
The core idea is to let music guide the body, which in turn guides the art tool. This method helps develop gross motor skills, improves body awareness (proprioception), and provides a powerful, non-verbal outlet for releasing emotions. By connecting an internal feeling (inspired by music) with an external action (painting or drawing), participants can achieve a state of flow and regulation.
How to Implement Music-Based Art
Success lies in creating an environment where movement is encouraged and safe. The focus should be on the experience of moving and creating, not on the artistic outcome.
- Paint Dancing: Lay a large sheet of paper on the floor. Play different styles of music and encourage participants to "dance" their paintbrushes, crayons, or even their hands and feet (with non-toxic paint) across the paper, matching their movements to the music's tempo and mood.
- Rhythm Stick Art: Provide rhythm sticks or drumsticks dipped in paint. Participants can tap out rhythms on a large shared canvas, creating a collaborative, percussive masterpiece. Actionable example: Play a simple "call and response" rhythm game. You tap a rhythm on the canvas (e.g., tap-tap-TAP), and the child copies it, creating marks with each beat.
- Movement-Based Mark-Making: Attach markers or charcoal to long sticks or even to wrists and ankles with tape. As participants move to music, they create large, sweeping marks on paper taped to walls or the floor, capturing the energy of their movements.
Actionable Insight: Match the music to the desired energy level. A fast, upbeat track can be great for releasing excess energy, while a slow, classical piece can encourage more controlled, calming movements. Observe the child's reaction and be ready to change the music if it seems to be causing distress or overstimulation.
Practical Tips for Success
- Define a Safe Space: Use tape on the floor or mats to create clear physical boundaries for each participant to move in, preventing collisions and sensory overload.
- Offer Choices: Allow individuals to choose whether they participate standing up, sitting down, or even lying on the floor. This honors their physical needs and comfort levels.
- Use Visual Cues: Pair music with visual cues, like colored lights that change with the tempo, to support individuals who are more responsive to visual information.
- Scaffold Gradually: Start with simple, slow rhythms and predictable movements. As participants become more comfortable, you can introduce more complex music and faster tempos.
8. Nature-Based and Outdoor Adaptive Art
Connecting with the natural world offers immense therapeutic benefits, making nature-based projects some of the most grounding art activities for special needs. This approach uses the outdoors as both a studio and a source of materials, encouraging creativity with elements like leaves, stones, twigs, and soil. It's especially beneficial for individuals with anxiety, ADHD, or autism, as it provides a vast, open-ended sensory experience that reduces feelings of confinement and performance pressure.
By shifting the focus from indoor tools to outdoor treasures, participants engage in a full-body creative process. This method helps improve gross and fine motor skills through gathering materials, enhances sensory integration by interacting with diverse natural textures, and fosters a sense of calm and connection to the environment.
How to Implement Nature-Based Art
Success lies in creating a safe, structured experience that encourages exploration. The key is to see the environment as a partner in the artistic process, providing endless inspiration and materials.
- Land Art Creations: Use collected stones, leaves, and sticks to create temporary patterns and sculptures on the ground, known as land art. This can be as simple as arranging colorful leaves in a spiral or building small twig structures.
- Natural Brushes and Paints: Make your own art tools by tying bundles of pine needles or broad leaves to a stick. Use mud, berry juice, or crushed charcoal mixed with water for natural, earthy paints.
- Leaf and Flower Pressing: Collect interesting leaves and flowers to press in a heavy book. Once dried, these can be used to create beautiful collages. Actionable example: Make "leaf rubbings." Place a textured leaf under a thin piece of paper and rub the side of an unwrapped crayon over it. The leaf's pattern will magically appear on the paper.
Actionable Insight: The temporary nature of outdoor art is a powerful lesson. Emphasize that the beauty is in the creation process, not in making something permanent. Use photography to document the art, celebrating the work without the pressure of preservation. This teaches children about mindfulness and enjoying the moment.
Practical Tips for Success
- Ensure a Safe Space: Before starting, inspect the outdoor area for potential hazards like sharp objects, poisonous plants, or uneven terrain. Clearly define the exploration boundaries.
- Provide Collection Tools: Equip participants with bags or buckets for gathering their natural art supplies. This gives the activity a clear purpose and helps with organization.
- Teach Respect for Nature: Guide participants to collect materials that have already fallen to the ground. This teaches sustainability and respect for living plants and ecosystems.
- Adapt for the Weather: Have a plan for different weather conditions. A sunny day is perfect for land art, while a drizzly day can be ideal for "mud painting."
Adaptive Art Activities: 8-Point Comparison
| Approach | Implementation Complexity 🔄 | Resource Requirements ⚡ | Expected Outcomes ⭐📊 | Ideal Use Cases 💡 | Key Advantages |
|---|---|---|---|---|---|
| Sensory Art Activities (Multi-Sensory Exploration) | Moderate 🔄 — planning, prep & cleanup; sensory checks | Medium ⚡ — varied tactile/scented materials, safe space | High ⭐📊 — multisensory engagement; anxiety regulation; sensory discrimination | Autism, sensory processing disorder, non-verbal participants | Inclusive; adaptable intensity; stimulates multiple neural pathways |
| Hand-Over-Hand Art Instruction | High 🔄 — one-on-one guidance; trained facilitators needed | High ⚡ — staff time, training, close supervision | High ⭐📊 — motor learning, muscle memory, increased participation | Severe motor disabilities, profound learning challenges | Enables full participation; builds trust and confidence |
| Adapted Art Tools and Adaptive Equipment | Low–Moderate 🔄 — assessment and fitting required | Medium–High ⚡ — purchase/maintenance of specialized tools | High ⭐📊 — greater independence and sustained engagement | Cerebral palsy, arthritis, limited grip strength | Promotes autonomy; works across media; scalable solutions |
| Digital and Technology-Based Art (AAC & Computer Art) | Moderate–High 🔄 — setup, training, troubleshooting | High ⚡ — devices, software, accessibility hardware | High ⭐📊 — removes fine motor barriers; immediate visual feedback | Non-verbal users, motor impairments, tech-friendly learners | Customizable; accessible interfaces; supports AAC integration |
| Adapted Painting and Drawing (Large-Scale, Modified Surfaces) | Moderate 🔄 — space and setup for large formats | Medium ⚡ — large materials, protective coverings | High ⭐📊 — visible results quickly; boosts confidence | Motor planning issues, attention challenges, group therapy | Encourages big movements; low pressure; rapid gratification |
| Collage and Cut-and-Paste Art (Adapted Scissor Work) | Low 🔄 — simple prep; templates available | Low ⚡ — inexpensive materials, safe scissors | Medium ⭐📊 — builds composition skills and confidence quickly | Fine motor challenges, beginners, low-confidence makers | Low cost; high success rate; minimal fine motor demand |
| Rhythm, Movement, and Music-Based Art (Kinesthetic Expression) | Moderate 🔄 — choreography, space management | Medium ⚡ — music, safe open area, facilitator skill | High ⭐📊 — regulation, motor coordination, engagement | ADHD, autism, kinesthetic learners, behavioral needs | Promotes regulation; whole-body engagement; playful learning |
| Nature-Based and Outdoor Adaptive Art | Moderate 🔄 — site prep, safety checks, weather planning | Low–Medium ⚡ — natural materials, outdoor access | Medium–High ⭐📊 — calming, connectedness, sensory richness | Anxiety, behavioral challenges, sensory seekers | Free materials; therapeutic nature connection; flexible formats |
Making Creativity Accessible for Every Child
Throughout this guide, we've explored a diverse landscape of creative expression, from the rich engagement of sensory art to the boundless possibilities of digital tools. Each approach, whether it's hand-over-hand instruction or using adaptive equipment, serves a single, powerful purpose: to unlock the artistic potential within every child. The goal is not to create a flawless masterpiece but to foster a journey of discovery, self-expression, and joy. The true value lies in the process, not just the final product.
The most important takeaway is that adaptation is the key to accessibility. A successful art experience hinges on our ability to modify materials, techniques, and environments to meet a child's unique needs. This means recognizing when large-scale painting might be more liberating than a small canvas, or when the structure of a cut-and-paste collage is more suitable than free-form drawing. These art activities for special needs are not rigid prescriptions but flexible starting points for you to build upon.
Putting It All Into Practice
So, where do you begin? Start small and focus on your child's interests and current abilities.
- Observe and Identify: Which activity from our list aligns most closely with what your child enjoys? Do they love tactile sensations (Sensory Art), technology (Digital Art), or being outdoors (Nature-Based Art)?
- Prepare Your Space: Create an environment that is both safe and inviting. Lay down protective coverings, organize materials so they are easy to reach, and minimize distractions.
- Introduce and Guide: Present the activity without pressure. Demonstrate how the tools work and offer support, but allow them the freedom to explore at their own pace.
Remember, even an activity as fundamental as coloring can be a profound tool for development. Coloring Advice: Use bold, high-contrast outlines and select familiar subjects to make the task less intimidating. Providing chunky crayons, "egg" shaped crayons, or adapted grips can transform a simple pastime into a successful and confidence-building exercise. If staying in the lines is a challenge, try "painting" the shapes with a Q-tip dipped in paint for more controlled application.
Ultimately, your role is that of a creative partner and facilitator. By embracing flexibility and celebrating every effort, you create a space where children feel empowered, understood, and creatively fulfilled. The confidence gained from successfully completing an art project can extend far beyond the craft table, positively impacting their communication, motor skills, and overall sense of self. Your encouragement opens a door to a world where their imagination can flourish without limits, proving that art is a universal language everyone can speak.
Ready to start with a simple, engaging, and highly motivating activity? Colortada offers an incredible library of high-quality, printable coloring pages featuring characters from popular games, cartoons, and movies. Find familiar faces that will instantly capture your child's interest and download them for free at Colortada to begin your artistic adventure today.
