Tired of the same old craft projects? Finding fresh, engaging, and genuinely educational art lesson ideas elementary students will love can be a challenge. You need activities that not only capture young imaginations but also build foundational skills without requiring a massive budget or endless prep time. This guide is designed to solve that problem by providing a go-to list of creative, easy-to-implement art lessons perfect for the classroom or at home.
We've curated nine actionable project ideas that are both fun for students and practical for teachers and caregivers. From understanding color theory with a simple color wheel to exploring texture and form, each lesson includes step-by-step guidance, practical coloring advice, and tips for adapting the project for different grade levels. This article will help you transform your space into a vibrant studio of creativity.
Get ready to explore projects that leverage simple materials, from found objects in nature to versatile resources like Colortada coloring pages, making art accessible for everyone. To keep inspiration flowing beyond this list, teachers can explore additional drawing and painting ideas that cater to various skill levels and themes. Let's dive into these exciting projects.
1. Color Wheel Painting
Transform a simple coloring session into a foundational lesson in color theory with a Color Wheel Painting activity. This hands-on project teaches elementary students the relationships between primary and secondary colors in a fun, engaging way. Instead of a blank circle, use a simple geometric or mandala coloring page from Colortada to add structure and intricate detail to the final piece.
Students begin by painting the three primary colors (red, yellow, blue) in distinct, non-adjacent sections of the coloring page. The real magic happens next: they mix these primary colors to create the secondary colors (orange, green, purple) and fill in the spaces between them. This process provides a tangible "aha!" moment as they see new colors emerge from their own mixing. This is one of the most effective art lesson ideas elementary teachers can use to build a strong artistic foundation.
Actionable Tips for Implementation
- Predict the Outcome: Before mixing, ask students to predict what color they will make by combining two primaries. For example, ask, "What do you think will happen when we mix this bright yellow with this deep blue?" This encourages critical thinking and builds anticipation.
- Discuss Color Temperature: Once the wheel is complete, introduce the concepts of warm colors (reds, oranges, yellows) and cool colors (blues, greens, purples). Ask students how each group makes them feel and to name objects associated with those colors (e.g., warm like the sun, cool like the ocean).
- Use Quality Materials: High-quality liquid watercolors or tempera paints will produce the most vibrant and true secondary colors. Use sturdy paper plates as palettes for easy mixing and cleanup. For those looking to delve deeper into painting techniques and approaches for young artists, consider consulting this Painting For Kids Complete Parent Guide.
Coloring Advice for a Clean Finish
To ensure crisp, beautiful results, teach students the 'wet-on-dry' watercolor technique, where wet paint is applied to a dry surface. This helps keep colors from bleeding into one another. Remind them to thoroughly rinse their brush between each color to prevent muddying their mixes—a "two-cup" system (one for rinsing, one for clean water) works wonders. For a bolder look, suggest they apply a second layer of paint after the first one has completely dried to deepen the saturation.
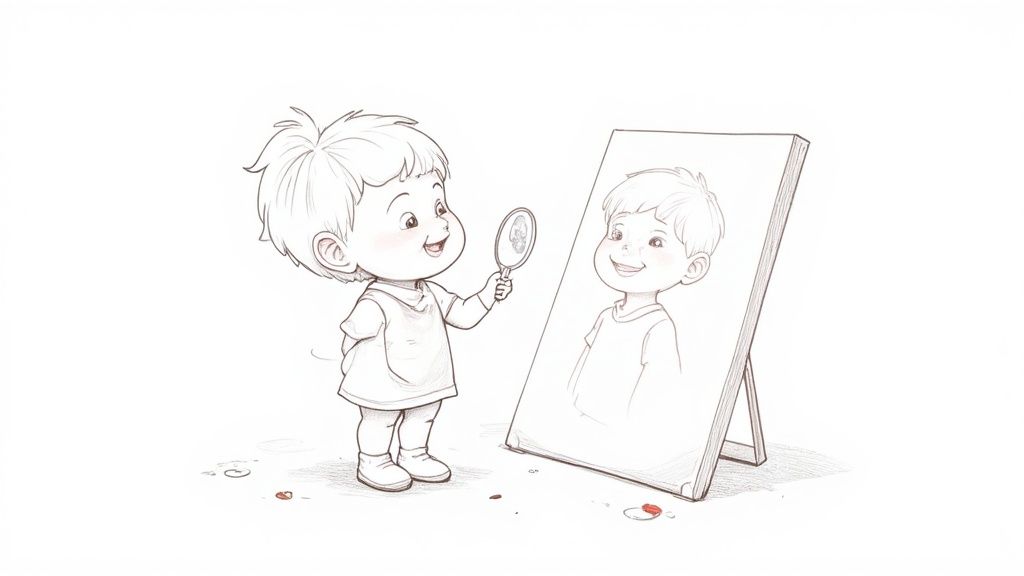
2. Self-Portrait Drawing
Turn the lens inward with a Self-Portrait Drawing lesson, an empowering project that builds observation skills, an understanding of proportion, and self-expression. Using mirrors or tablets, students study their own faces, learning to identify key features and their placement. This activity moves beyond a simple drawing exercise into a meaningful exploration of identity, making it one of the most personal art lesson ideas elementary students can experience.
Students learn to break down the face into basic shapes, observing where their eyes, nose, and mouth sit in relation to one another. This focus on direct observation is a foundational skill in art. The lesson can also be a gateway to discussing famous artists like Frida Kahlo, whose self-portraits expressed deep emotion, or Vincent van Gogh, who captured his likeness in various styles. This approach connects students' work to the broader world of art history, showing them that a self-portrait is a powerful form of storytelling.
Actionable Tips for Implementation
- Start with Basic Shapes: Guide students to draw a simple oval for the head and add guidelines for the eyes (halfway down the oval), nose (halfway between eyes and chin), and mouth. This provides a structural starting point and reduces intimidation.
- Emphasize Individuality: Remind students that the goal is not a "perfect" photograph but a drawing that captures their unique essence. Celebrate every detail, from freckles to glasses, as part of what makes them special.
- Integrate Creative Backgrounds: Encourage students to fill the background with patterns, colors, or symbols that represent their personality, hobbies, or dreams. A practical example would be drawing soccer balls in the background for a sports lover or musical notes for a musician. This adds another layer of personal expression. For extra practice with foundational shapes, consider using some free outline drawings as warm-up exercises.
Coloring Advice for a Clean Finish
To bring the portrait to life, advise students to use colored pencils or crayons to layer colors for skin tones, rather than using a single "peach" or "brown" crayon. Show them how to blend light browns, pinks, and yellows to create more realistic and dynamic shades. For the hair, encourage them to draw individual strands and use multiple shades (e.g., dark brown, light brown, and black) to create depth and texture, rather than coloring it in as a solid block. Remind them to use a light touch at first, as it’s easier to add color than it is to take it away.
3. Nature Collages
Bridge the gap between outdoor exploration and classroom creativity with a Nature Collage project. This lesson encourages students to engage with their environment by collecting natural materials like leaves, flowers, twigs, and stones to assemble into unique artistic compositions. It’s an eco-friendly practice that teaches fundamental art concepts such as texture, composition, and balance using the beauty of the natural world.
Inspired by land artists like Andy Goldsworthy, students learn to see artistic potential in everyday objects. They can arrange their found materials on a sturdy piece of cardstock or even use them to embellish a printed coloring page, turning a simple outline into a three-dimensional masterpiece. This activity is one of the most hands-on art lesson ideas elementary students will experience, fostering both artistic skill and environmental appreciation.
Actionable Tips for Implementation
- Host a Nature Walk: Organize a walk around the schoolyard or a nearby park specifically for collecting materials. Give each student a bag and a list of items to look for, such as "something rough," "something smooth," or "three different colored leaves."
- Press and Preserve: For more durable, long-lasting collages, press delicate flowers and leaves between heavy books for a few days before the art lesson. This flattens them and makes them easier to glue.
- Discuss 'Leave No Trace': Use this as an opportunity to teach environmental stewardship. Instruct students to only collect materials that have already fallen to the ground and to respect living plants and animal habitats.
Coloring Advice for a Clean Finish
To create a dynamic mixed-media piece, have students color a background on their paper before gluing on the natural elements. Using colored pencils or crayons to create a sky, grassy field, or even an abstract pattern adds depth and context. For example, they could color a blue sky at the top and green grass at the bottom to set a scene for their leaf and twig creations. Remind them to apply a strong, clear-drying glue like PVA to securely attach heavier items like small pebbles or thick twigs. For inspiration on what backgrounds to draw, explore these free nature coloring pages from Colortada.
4. Clay Pinch Pots
Introduce the ancient art of ceramics with a hands-on lesson in making Clay Pinch Pots. This tactile project allows students to connect with a fundamental pottery technique, transforming a simple ball of clay into a unique, functional vessel. Students begin with a palm-sized sphere of clay, press their thumb into the center, and gently pinch the walls to shape their pot, learning patience and fine motor control.
This process offers a wonderful opportunity to discuss the history and cultural significance of pottery, from Native American traditions to Japanese tea ceremony vessels. By engaging in a craft that spans millennia, students gain a deeper appreciation for form, function, and artistic heritage. It's one of the most rewarding art lesson ideas elementary students can experience, as they create a durable piece of three-dimensional art entirely with their own hands.
Actionable Tips for Implementation
- Keep Clay Workable: Always keep the clay covered with a damp cloth or paper towel when not in use to prevent it from drying out too quickly. Have small spray bottles with water on hand for students to lightly moisten their clay if it starts to feel dry.
- Start Small: Provide each student with a small, tennis ball-sized piece of clay. This amount is manageable for small hands and helps ensure more successful, evenly walled pots.
- Prevent Cracking: Teach students to dry their finished pots slowly. Place them away from direct heat or drafts, perhaps lightly covered with plastic for the first day, to minimize the risk of cracks.
Coloring Advice for a Clean Finish
Once the pinch pots are completely dry (or have been bisque fired), they are ready for color. Acrylic paints offer a vibrant, opaque finish. Encourage students to apply thin, even coats of paint, allowing each layer to dry before adding the next one to avoid a clumpy texture. For detailed patterns or designs, fine-tipped permanent markers work beautifully on a painted surface. A practical tip is to paint the inside a single, solid color and the outside with a contrasting pattern, like dots or stripes. A final coat of clear sealant or Mod Podge will protect the paint and give the pot a professional, glossy sheen.
5. Printmaking with Found Objects
Introduce the exciting world of printmaking by turning everyday items into artistic tools. This lesson transforms common objects into stamps, teaching students about repetition, pattern, and texture in a uniquely hands-on way. Instead of a blank canvas, provide a simple Colortada coloring page with large, open spaces, allowing students to fill the areas with their unique printed designs.
Students can dip objects like leaves, bubble wrap, bottle caps, or even carved potatoes into washable paint and press them onto their paper. This process reveals how different textures create different effects and how repeating a single shape can produce a complex pattern. Exploring printmaking is one of the most inventive art lesson ideas elementary classrooms can adopt, as it encourages resourcefulness and shows that art supplies are all around us.
Actionable Tips for Implementation
- Establish Printing Stations: Set up several stations around the classroom, each with a different type of found object (e.g., a "Nature" station with leaves and twigs, a "Recycled" station with cardboard tubes and plastic forks). This encourages movement and experimentation.
- Discuss Positive and Negative Space: Before printing, show students how the object itself is the positive space (the part that gets the paint) and the area around it is the negative space. Ask them to predict what the print will look like.
- Connect to Other Subjects: Use coin rubbings to talk about history and currency, or leaf prints to tie into a science unit on botany. This interdisciplinary approach deepens the learning experience.
Coloring Advice for a Clean Finish
To create crisp, clear prints, instruct students to apply a thin, even layer of paint to their object using a brush or sponge, rather than dipping it into a puddle of paint. A thick glob of paint will smudge the details. Remind them to press down firmly and evenly then lift the object straight up to avoid smearing. For layered compositions, ensure the first layer of prints is completely dry before adding a second. This prevents colors from becoming muddy and keeps the individual patterns distinct.
6. Collaborative Murals
Foster a sense of community and teamwork in your classroom with a Collaborative Mural project. This large-scale group artwork involves each student contributing a piece to a larger, unified composition, creating a stunning display for classroom walls. Using a collection of related coloring pages, such as a series of different flowers or animals from Colortada, allows each student to work on an individual piece that will later fit into a cohesive and beautiful whole.
The process begins by choosing a theme and having each student or small group color a specific page. Once complete, the individual artworks are assembled like a quilt to form the final mural. This activity beautifully illustrates how individual contributions can come together to create something greater than the sum of its parts. It stands as one of the most impactful art lesson ideas elementary schools can use to promote cooperation, planning, and shared ownership of a creative achievement.
Actionable Tips for Implementation
- Plan the Composition: Before coloring, lay out the blank pages on the floor to plan the final arrangement. This helps visualize the end result and ensures the composition flows well. For example, arrange animal pages to create a jungle scene or flower pages to form a garden.
- Create a Unified Palette: Limit the color choices to a specific palette (e.g., only warm colors, or a set of 5-6 specific markers). This simple constraint helps guarantee the final mural looks cohesive, even with many different artists contributing.
- Discuss Community Artists: Introduce students to muralists like Diego Rivera or community artists like Keith Haring. Discuss how their art brought people together and told a story for a whole community.
Coloring Advice for a Clean Finish
To ensure visual unity, encourage students to color all the way to the edges of their paper so there are no distracting white gaps when the pieces are assembled. Using markers or colored pencils will provide bold, consistent color that stands out from a distance. A great practical tip is to suggest that students outline key parts of their drawing in a thick black marker before coloring; this makes the individual elements pop within the larger mural and adds a "stained glass" effect.
7. Observational Drawing from Still Life
Introduce students to a foundational artistic practice with an Observational Drawing lesson. This classic exercise involves arranging everyday objects into a still life composition for students to draw, honing their skills in careful observation, proportion, and detail. Instead of a blank sheet, you can use a lightly printed coloring page from Colortada featuring simple outlines of objects, which students can then enhance with their own shading and details.
The core of this activity is teaching students to draw what they see, not what they think they see. By focusing on subjects like fruit, geometric blocks, or classroom items, students learn to analyze shapes, lines, and the interplay of light and shadow. This exercise builds crucial visual perception and hand-eye coordination, making it one of the most effective art lesson ideas elementary educators can use to teach traditional drawing techniques.
Actionable Tips for Implementation
- Start with Simple Forms: Begin with one or two simple objects, like a sphere and a cube, to make concepts like proportion and shading easier to grasp. A practical example is setting up a single apple for each table group to draw.
- Use a Viewfinder: Create simple viewfinders out of cardboard (a small rectangle cut from a larger piece) to help students frame their composition and focus on a specific part of the still life arrangement.
- Identify the Light Source: Place a single, strong light source (like a desk lamp) to create clear highlights and shadows. Before drawing, ask students to point to where the light is hitting the objects and where the darkest shadows are.
Coloring Advice for a Clean Finish
When adding color or shading, encourage students to look more at the still life than at their paper. For shading with pencils, teach them to use the side of the lead to create soft, blended tones rather than the sharp point. If using colored pencils or crayons, show them how to layer different colors to create richer, more realistic shadows instead of just using black or gray. For example, a shadow on a red apple might have hints of dark blue or purple within it, which they can discover by looking closely.
8. Paper Sculpture and 3D Construction
Introduce students to the exciting world of three-dimensional art with a Paper Sculpture and 3D Construction lesson. This activity moves beyond the flat page, teaching elementary students how basic paper engineering techniques like folding, cutting, curling, and layering can create dynamic forms. Students learn spatial reasoning and discover how a simple material can be transformed into a complex, dimensional artwork.
This project challenges students to think like sculptors and architects, turning a 2D material into a 3D object. They can create anything from abstract forms to intricate pop-up scenes or even simple architectural models. By manipulating paper, students gain a hands-on understanding of structure, balance, and form, making this one of the most engaging art lesson ideas elementary schools can incorporate to build foundational skills in both art and engineering.
Actionable Tips for Implementation
- Demonstrate Key Techniques: Start by clearly demonstrating a few core techniques step-by-step, such as creating a paper spring (accordian fold), a curling strip (by pulling paper over a scissor's edge), a fan fold, or a tab-and-slot connection. Let students practice these skills on scrap paper first.
- Start with a Strong Base: Provide a sturdy piece of cardstock or a small cardboard square as a base for students to build their sculptures on. This provides stability and a defined space for their creation.
- Explore Inspirational Artists: Show examples from famous paper artists like Robert Sabuda or Peter Dahmen to inspire students and showcase the incredible potential of paper as a sculptural medium.
Coloring Advice for a Clean Finish
Encourage students to add color and pattern to their paper components before they begin cutting and assembling them. This is much easier than trying to color a complex, assembled 3D form. For a practical application, students could color one side of the paper a warm color and the other a cool color, so their folds and curls reveal interesting contrasts. Using markers, colored pencils, or even printing a colorful design from Colortada's art-themed coloring pages onto the paper first can add incredible visual interest.
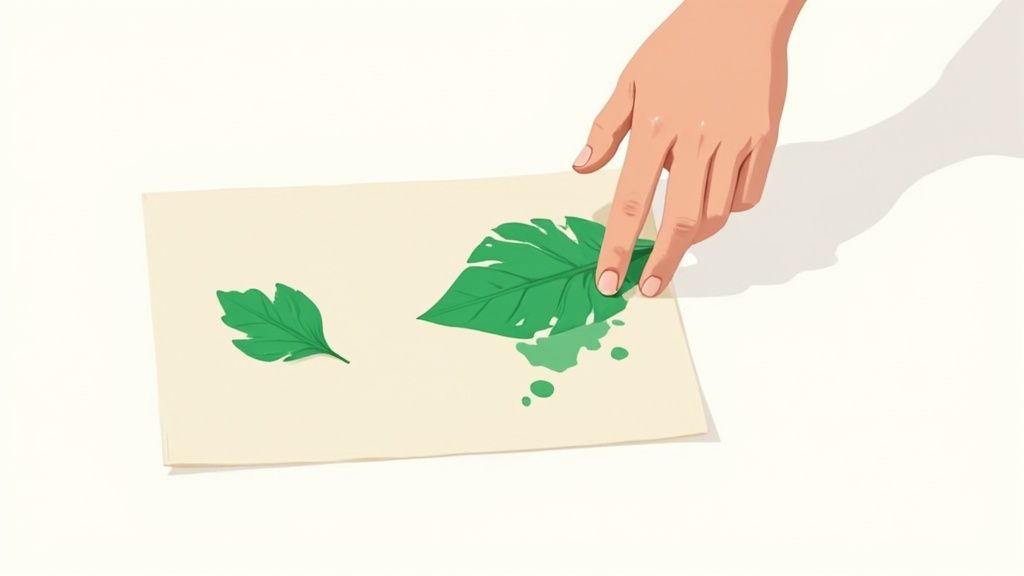
9. Texture Rubbings and Exploration
Unlock a world of sensory discovery with a Texture Rubbings and Exploration lesson. This tactile activity heightens students' awareness of their environment by teaching them to capture surface patterns on paper. Using simple materials, children learn about texture as a fundamental element of art, creating surprisingly detailed and complex images from everyday objects.
Students place a thin sheet of paper over a textured surface, like a leaf, a brick wall, or a piece of fabric. They then rub the side of a crayon or pencil over the paper to transfer the pattern. The process feels like magic as hidden textures appear right before their eyes. This method, known as "frottage" and famously used by surrealist artist Max Ernst, is one of the most accessible art lesson ideas elementary students will love, connecting art directly to the world around them.
Actionable Tips for Implementation
- Go on a Texture Hunt: Turn the lesson into a scavenger hunt. Give students a small viewfinder made of cardboard and have them search for interesting textures around the classroom or schoolyard. Specific examples include the bottom of a sneaker, a coin, or a radiator grille.
- Create a Texture Collage: Once students have collected a variety of rubbings on different papers, have them cut out their favorite patterns and arrange them into a collage, creating a new composition from found textures.
- Discuss Descriptive Words: As students find textures, build their vocabulary by brainstorming descriptive words. Is the texture bumpy, rough, smooth, ridged, or soft? This integrates language arts into the art lesson.
Coloring Advice for a Clean Finish
For the clearest results, instruct students to use thin paper, like standard copy paper, as it picks up details more effectively than heavy cardstock. Show them how to peel the paper off their crayons and use the long side for broad, even rubbing. For an interesting effect, encourage layering by having them slightly move the paper over the same object and rub with a different color, creating a rich, multi-hued and almost three-dimensional look.
9 Art Lesson Ideas Comparison Guide
| Activity | Implementation Complexity 🔄 | Resource Requirements ⚡ | Expected Outcomes 📊 | Ideal Use Cases 💡 | Key Advantages ⭐ |
|---|---|---|---|---|---|
| Color Wheel Painting | Low to Moderate | Moderate (paints, brushes, paper) | Understanding of primary/secondary colors, color mixing | Early art education, color theory foundation | Builds fundamental art knowledge, engaging |
| Self-Portrait Drawing | Moderate | Low (paper, pencils, mirrors) | Improved observation, facial proportion, self-expression | Drawing skills, self-awareness activities | Personal, confidence-building |
| Nature Collages | Low to Moderate | Low (found natural materials, glue) | Composition skills, environmental awareness | Outdoor learning, eco-friendly art projects | Environmentally friendly, cost-effective |
| Clay Pinch Pots | Moderate to High | High (clay, tools, kiln access) | Fine motor skills, 3D creation, pottery basics | Ceramics introduction, cultural art lessons | Highly tactile, cultural connection |
| Printmaking with Found Objects | Low to Moderate | Low (paint/ink, found objects, paper) | Printmaking basics, pattern creation | Pattern study, creative exploration | Low cost, multiple artworks from one source |
| Collaborative Murals | High | Moderate to High (large space, paints) | Cooperation, large-scale composition, community building | Group projects, classroom decoration | Promotes teamwork, impressive displays |
| Observational Drawing from Still Life | Moderate | Low (drawing materials, simple objects) | Observational drawing skills, shading, proportion | Traditional drawing skills, focus practice | Builds fundamental drawing skills |
| Paper Sculpture and 3D Construction | Moderate to High | Low to Moderate (paper, cutting tools) | Spatial reasoning, 3D art understanding | Sculpture introduction, engineering concepts | Develops problem-solving, appealing forms |
| Texture Rubbings and Exploration | Low | Very Low (paper, crayons, textured surfaces) | Sensory awareness, texture recognition | Sensory/art connection, quick exploration | Accessible, guaranteed success |
Bringing It All Together in Your Classroom
We’ve explored a vibrant spectrum of creative projects, from the foundational principles of the Color Wheel Painting to the collaborative energy of a classroom mural. Each of these nine art lesson ideas for elementary students offers more than just a way to fill an afternoon; they are carefully structured pathways to developing crucial skills. These activities are designed to build fine motor control, encourage critical thinking, and foster a lifelong appreciation for artistic expression.
Remember, the goal is not perfection but participation. A self-portrait isn't about photorealism; it's about self-reflection and observation. A nature collage is less about precise cutting and more about appreciating the textures and shapes found in the natural world.
Key Takeaways for Immediate Implementation
To make these lessons truly impactful, focus on the process over the final product. The real learning happens during the experimentation, the problem-solving, and the "happy accidents" that occur along the way.
Here are the most important takeaways to apply:
- Adaptability is Key: Each idea, from paper sculpture to printmaking, can be scaled up or down. A simple texture rubbing with crayons and a single leaf can be just as valuable as a complex multi-object composition. Use the resources you have, whether it’s a full art supply closet or just paper, pencils, and found objects from the playground.
- Integrate Core Concepts: Use these projects to reinforce other subjects. Discuss geometry during paper sculpture construction, biology during observational drawings of plants, or community and teamwork while planning a collaborative mural. This cross-curricular approach deepens understanding and makes art feel integral to learning.
- Empower Student Choice: Whenever possible, offer choices. Let students select their own subjects for observational drawing, pick the color palettes for their clay pots, or choose the found objects for their printmaking experiments. This ownership fosters greater engagement and pride in their work.
Your Actionable Next Steps
Feeling inspired? The best way to begin is to simply start. You don't need to implement all nine ideas at once. Choose one project that resonates with you and aligns with your current curriculum or available supplies.
- Pick One Project: Select an idea from the list, perhaps the "Printmaking with Found Objects" for its low-cost, high-impact appeal.
- Gather Simple Materials: Collect everyday items like bottle caps, leaves, and cardboard tubes, along with some paint and paper.
- Start Small: Dedicate a 30-minute art session to experimenting with making prints. Focus on the single concept of creating patterns and textures.
- Celebrate the Process: Display every student's creation, highlighting the unique patterns each discovered. Discuss what worked, what was challenging, and what they might try differently next time.
By embracing these art lesson ideas for elementary classrooms, you are not just teaching art techniques; you are cultivating confidence, nurturing creativity, and providing a vital outlet for self-expression. You are giving your students the tools to see the world differently and the courage to make their own unique mark on it.
Ready to simplify your lesson planning and find the perfect starting point for any art project? Explore the extensive library at Colortada, where you'll discover thousands of high-quality, printable coloring pages that can serve as templates for self-portraits, inspiration for nature collages, and outlines for color theory exercises. Visit Colortada today to unlock endless creative possibilities for your classroom.
