In today's fast-paced world, finding quality time to connect as a family can be a challenge. That's where the magic of art comes in. Engaging in creative activities together isn't just about making something beautiful; it's about building memories, fostering communication, and developing crucial skills in a fun, low-pressure environment. The art projects for families detailed in this guide are designed to be accessible, enjoyable, and packed with actionable insights. We’ll ensure a successful and memorable creative session for everyone, from toddlers to teens and parents alike.
This listicle will provide you with ten unique and engaging projects, moving beyond generic advice to offer specific, practical steps. You will learn how to turn a simple nature walk into a collage, transform your dining table into a canvas-painting studio, and even create large-scale collaborative murals. We will also explore how simple tools, like printable coloring pages from Colortada, can be a fantastic starting point for many of these activities, offering excellent practice for color blending and shading techniques.
These projects offer more than just a fun afternoon; they create opportunities for shared accomplishment and strengthen family bonds. Beyond individual projects, you can even establish creative family ideas for holiday traditions with a purpose that incorporate art with a focus on giving back. Prepare to get a little messy and a lot more connected as we dive into ten fantastic projects that will bring your family closer, one brushstroke at a time.
1. Nature Collage & Scavenger Hunt Art
Combine outdoor exploration with creative expression in one of the most engaging art projects for families: the nature collage. This activity starts with a scavenger hunt where everyone collects natural treasures like vibrant leaves, interesting twigs, fallen petals, smooth stones, and textured bark. The goal is to observe and appreciate the environment before turning your findings into a unique masterpiece.
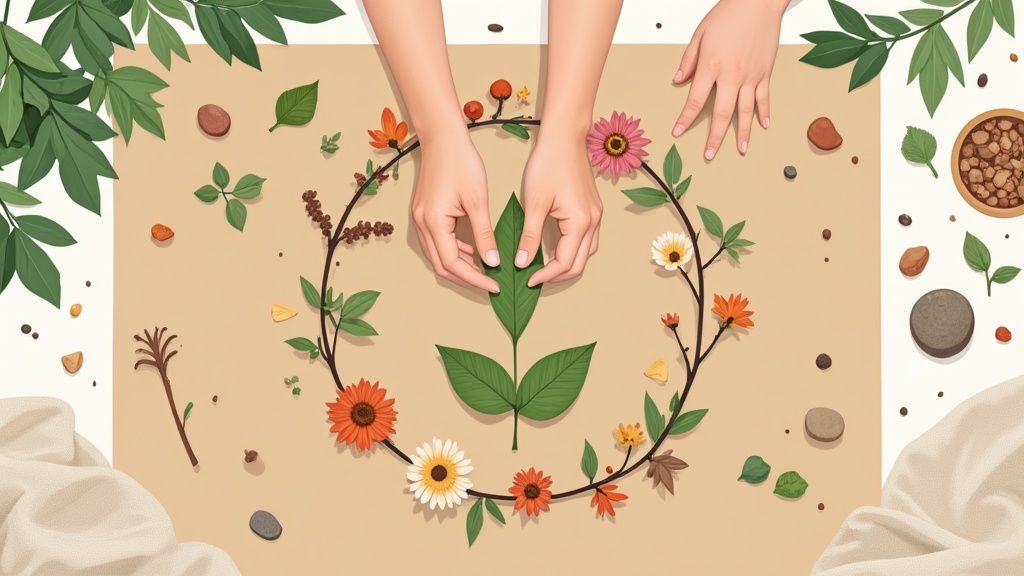
This project is perfect for a sunny afternoon, connecting children with the natural world while developing their fine motor skills and sensory awareness. Back inside, use a piece of cardboard or poster board as your canvas and arrange the collected items. You can create abstract designs, form animal shapes, or even craft intricate mandalas.
Implementation Tips
- Prepare Your Materials: Before heading out, gather a bag or container for each family member. Have strong craft glue and a sturdy base like cardboard ready for when you return. For a practical example, use a recycled cereal box flattened out as your canvas.
- Press and Preserve: For a flatter, more durable collage, press flowers and leaves between heavy books for a few days before gluing. Laminating the final artwork can also preserve its beauty.
- Integrate Coloring: Enhance your collage by adding hand-colored elements. Print and color some of our beautiful designs, then cut them out and glue them alongside your natural finds. You can find many inspiring options in our collection of free nature coloring pages from Colortada. Coloring Advice: Use colored pencils to match the earthy tones of your found items; try layering brown and green on a leaf coloring page to create a realistic effect before adding it to your collage.
- Create Themes: Challenge your family to create themed collages based on seasons, colors (an all-green collage), or textures (a collage with only rough or smooth items). This encourages deeper observation during your scavenger hunt.
2. Canvas Painting & Art Night
Transform your living room into an artist’s studio with a family canvas painting night, one of the most memorable art projects for families. This activity allows each person to express their creativity on an individual canvas or collaborate on a single, larger piece. Inspired by popular social painting events, this family-friendly version creates lasting keepsakes and a fun, shared experience.
Whether you choose a guided theme, a paint-by-numbers kit, or complete freestyle expression, the focus is on the process of creating together. It's an excellent way to boost confidence and introduce painting techniques in a relaxed setting. The resulting artwork becomes a proud display of your family's collective imagination.
Implementation Tips
- Set the Scene: Lay down a drop cloth or old newspapers to protect your surfaces. Use washable, non-toxic acrylic paints for easy cleanup and safety. Create an inspiring atmosphere with some background music and snacks.
- Provide Inspiration: Offer a few reference images or themes, like a favorite landscape, a family pet, or abstract color patterns. This gives younger artists a starting point if they feel unsure. A practical example is to have everyone paint their own version of the family cat from a single photo.
- Combine with Coloring: Before painting, warm up your creative muscles by coloring. Print some character or landscape designs to practice color combinations and get ideas for your canvas. Explore our collection of free coloring pages for indoor family activities from Colortada for inspiration. Coloring Advice: Pay attention to how colors create mood. For a sunset painting, practice blending red, orange, and yellow on a coloring page first to see how they transition.
- Frame and Display: Once the paintings are completely dry, frame them and create a family art gallery wall. This celebrates everyone’s effort and encourages a sense of pride in their work.
3. Collaborative Mural or Large-Scale Art Project
Transform a large canvas, a roll of paper, or even a designated wall into a stunning masterpiece with a collaborative mural. This is one of the most rewarding art projects for families, as it encourages teamwork, communication, and a shared creative vision. Each family member contributes their unique style to a section, learning to blend their ideas to create one cohesive and impressive artwork.
This project teaches valuable lessons in collaboration and compromise while producing a significant piece of art the whole family can be proud of. Whether you create an abstract explosion of color or a detailed scene, the process of working together on a grand scale is a memorable bonding experience that results in a lasting decoration for your home.
Implementation Tips
- Establish a Theme: Before you start, decide on a unifying theme, color palette, or general design. This could be a favorite landscape, a collection of abstract shapes, or a scene from a beloved story. Sketching a basic outline can provide helpful guidance. A practical example is an "Under the Sea" theme where one person paints coral, another paints fish, and a third adds the blue water background.
- Divide and Conquer: Assign each family member their own section of the canvas or paper. You can use painter's tape to create clean, defined borders for each person's area. This ensures everyone has a dedicated space to express their creativity.
- Incorporate Coloring Pages: For intricate details or characters, integrate coloring pages into your mural. Have family members color designs from a specific collection, like our fantasy coloring pages from Colortada, then cut them out and glue them onto the mural. Coloring Advice: Use markers with bold, saturated colors for your cut-outs so they stand out against the painted background of the mural.
- Document the Journey: Take photos or a time-lapse video of the entire process from the blank canvas to the finished product. Capturing the teamwork and evolution of the mural makes the memory of creating it just as special as the final artwork itself.
4. Handprint & Footprint Art Projects
Capture a moment in time with one of the most heartwarming art projects for families: handprint and footprint art. This cherished activity involves using family members' hands and feet as stamps, dipped in paint to create deeply personal patterns, animals, or family trees. It’s a wonderfully tactile way to create a keepsake that documents your children's growth and your family's unique bond.
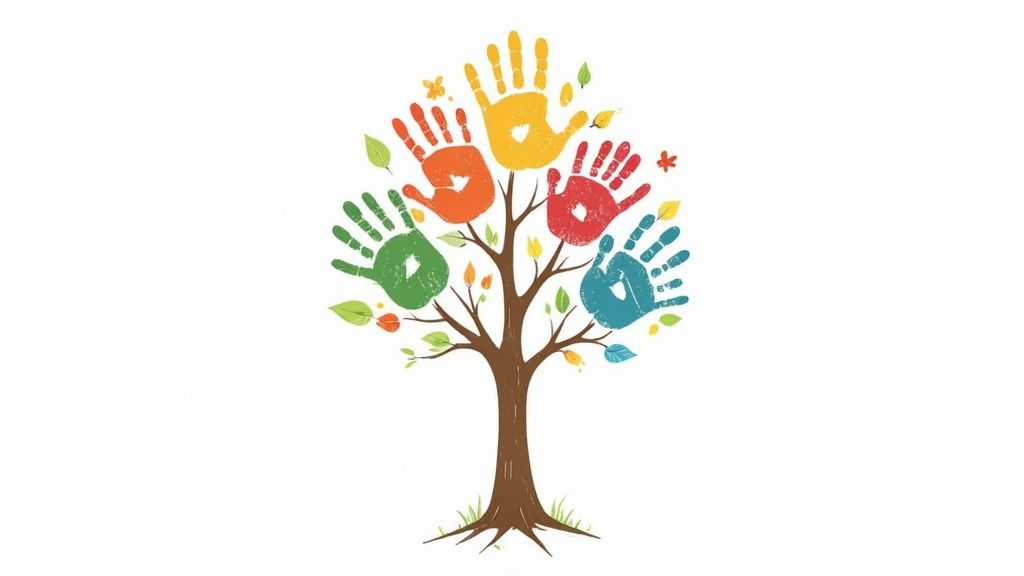
This project is especially meaningful for families with young children, turning tiny prints into precious memories. You can transform a simple handprint into a vibrant flower, a series of prints into a family tree, or a footprint into the body of a cute animal. These creations make perfect gifts for Mother’s Day, Father’s Day, or just a beautiful piece of decor that tells your family’s story.
Implementation Tips
- Choose Safe Materials: Always use washable, non-toxic paint to ensure the activity is safe and cleanup is easy. Have wipes or a basin of water nearby for quick cleaning.
- Practice First: Before committing to your final canvas or paper, do a few practice prints on a scrap sheet. This helps everyone get comfortable with the process and ensures you apply firm, even pressure for a clear impression. For example, press a paint-covered hand onto an old newspaper to check that all fingers are visible.
- Add Artistic Details: Once the prints are dry, bring them to life with fine-tip markers or paint pens. Add eyes to make an owl, a stem to turn a handprint into a flower, or write names and dates next to each print for a personalized touch.
- Incorporate Coloring Pages: Elevate your project by combining prints with colored elements. Print a simple design, like a tree trunk from our free tree coloring pages from Colortada, and let your family add their handprint "leaves" to its branches. Coloring Advice: For the tree trunk, use brown crayons and press hard on the edges to create a bark-like texture. Use lighter pressure in the middle to give the trunk a rounded look.
5. Tie-Dye & Batik Workshop
Transform plain white textiles into vibrant, wearable art with a family tie-dye or batik workshop. This classic project uses resist-dyeing techniques where fabric is bound, folded, or coated with wax to prevent dye from reaching certain areas, creating stunning patterns. It’s a fantastic way to teach color theory and basic chemistry while producing custom clothing everyone will be proud to wear.
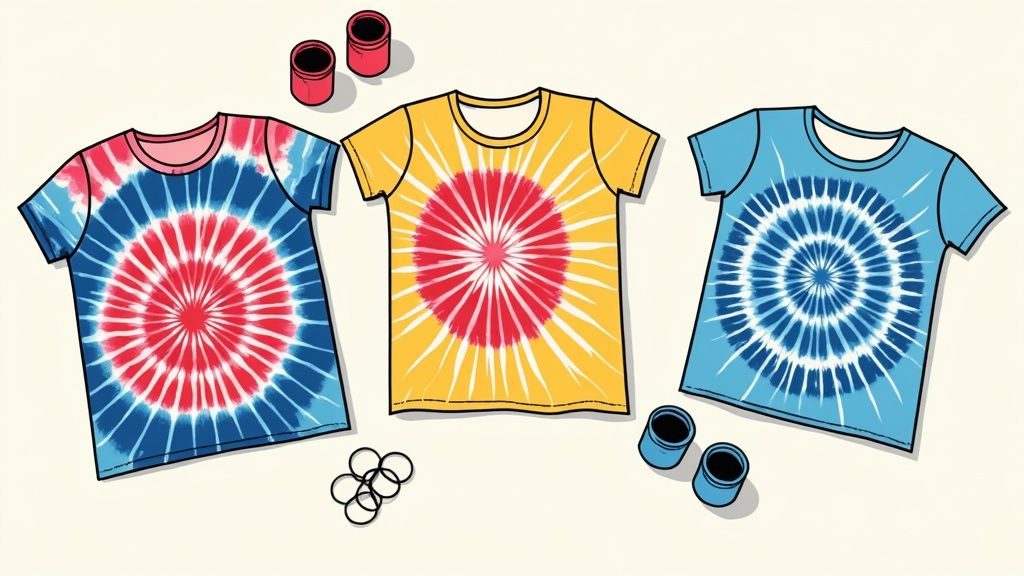
This hands-on activity is perfect for a warm, sunny day in the backyard and stands out as one of the most memorable art projects for families. From t-shirts and socks to tote bags and bandanas, the possibilities are endless. The big reveal, when you finally rinse the fabric and see your unique design, is a moment of pure magic for all ages.
Implementation Tips
- Prepare Your Workspace: Cover your work area with a plastic tarp and wear old clothes or aprons, as dye can stain permanently. Use gloves to protect your hands.
- Choose the Right Fabric: For the most vibrant results, use 100% natural fiber items like cotton, rayon, or silk. Pre-wash all your items without fabric softener to remove any sizing.
- Create Your Patterns: Use rubber bands, string, or clips to create patterns. For a classic spiral, pinch the center of a damp shirt and twist it into a flat "cinnamon roll" before securing it with bands. For batik, use melted wax to draw designs before dyeing. A simple example for kids is the "crumple" technique: just scrunch the shirt into a ball and wrap bands around it for a chaotic, starry pattern.
- Follow Dye Instructions: Carefully mix your dyes according to the package instructions. Apply the colors, let the items sit for the recommended time (usually 6-8 hours or overnight), and then rinse under cold water until it runs clear before washing.
6. DIY Clay & Pottery Projects
Working with clay is one of the most tactile and rewarding art projects for families, allowing everyone to create three-dimensional objects from a simple lump of earth. This hands-on activity involves sculpting, molding, and shaping air-dry or polymer clay into everything from decorative sculptures and pinch pots to functional items like jewelry dishes or pencil holders. It’s a wonderful sensory experience that builds patience and spatial reasoning.
This project is fantastic for all ages because it can be as simple or as complex as you like. Younger children can enjoy the simple act of squishing and rolling, while older kids and adults can explore more advanced hand-building techniques like coiling or slab construction. The final products become treasured keepsakes or heartfelt handmade gifts.
Implementation Tips
- Start with Simple Techniques: Begin with basic hand-building methods. A "pinch pot" is a great first project: just roll a ball of clay and press your thumb into the center, pinching the walls to create a small bowl.
- Keep Clay Workable: Have a small bowl of water handy to keep the clay moist, but avoid making it too wet or muddy. If cracks appear while you’re working, gently smooth them over with a dab of water on your finger.
- Use Household Tools: You don’t need professional tools. A fork can create interesting textures, a toothpick is great for fine details, and a plastic knife works well for cutting shapes. For a practical example, press a leaf into the clay to create a fossil-like imprint.
- Paint and Personalize: Once your air-dry clay creation is fully hardened, the artistic fun continues. Use acrylic paints to add vibrant colors and patterns. For an extra creative layer, you can draw inspiration from our intricate designs, like those found in our free mandala coloring pages from Colortada, to paint complex and beautiful patterns on your pottery.
- Seal for Durability: Apply a coat of clear sealant or Mod Podge to your finished and painted piece. This protects the paint and gives your creation a durable, glossy finish.
7. Photo Collage & Memory Book Creation
Turn cherished memories into tangible art with one of the most heartwarming art projects for families: creating a photo collage or memory book. This activity involves gathering family photographs, ticket stubs, handwritten notes, and other memorabilia to assemble a visual story of your life together. It’s a wonderful way to revisit happy moments and preserve them for future generations.
This project combines scrapbooking, design, and storytelling, allowing each family member to contribute their favorite pictures and mementos. The final product can be a beautiful collage to hang on the wall or a detailed memory book to flip through on special occasions, making it a truly personal and lasting piece of family art.
Implementation Tips
- Organize Your Supplies: Before you start, gather your materials. You’ll need a sturdy base like a scrapbook or poster board, acid-free glue or tape, scissors, and your collection of photos and keepsakes. Sorting photos by theme, person, or date can make the process smoother.
- Plan Your Layout: Create a rough sketch of your design before gluing anything down. Arrange photos and memorabilia on the page to see how they fit together. This helps create a balanced and visually appealing composition. For example, create a "Beach Vacation" page with photos surrounded by a border of sand glued to the paper.
- Incorporate Text and Textures: Add depth by including handwritten captions, dates, or short stories next to the photos. Mix in different textures like fabric scraps, ribbons, or pressed flowers to make the pages more engaging and sensory-rich.
- Add Hand-Colored Elements: Personalize your memory book by including colored drawings. Print and color some of our intricate patterns or designs to use as unique borders, backgrounds, or decorative accents on your pages. Coloring Advice: Use fine-tip markers for crisp lines on your border designs. A metallic gold or silver marker can add an elegant touch to scrapbook pages. For more detailed inspiration on preserving precious moments, consider exploring these 8 Heartfelt Ideas for a Memory Book You'll Cherish.
8. Recycled & Upcycled Art Projects
Transform everyday household waste into imaginative treasures with one of the most resourceful art projects for families: upcycled art. This activity encourages everyone to see the potential in items usually thrown away, like plastic bottles, cardboard boxes, old fabric scraps, and newspapers. It’s a powerful lesson in sustainability, teaching environmental responsibility while unleashing boundless creativity.
This project is perfect for any day, turning a collection of “junk” into robots, castles, bottle cap mosaics, or abstract sculptures. The process of sorting, designing, and assembling helps develop problem-solving skills and innovative thinking. Your family can create something entirely new and functional, giving old materials a vibrant second life while sparking important conversations about consumption and recycling.
Implementation Tips
- Create a Collection Station: Designate a box or bin as your family’s “art recycling center.” Encourage everyone to contribute clean and safe materials like cardboard tubes, plastic containers, and fabric scraps.
- Plan and Prep: Before you start building, clean all materials thoroughly. Sketch out a few design ideas together to decide what you want to create, whether it's a futuristic cityscape from boxes or colorful animals from plastic bottles. A practical example is building a knight's castle using cardboard tubes for towers and a large box for the main structure.
- Use Strong Adhesives: For creations that last, use a hot glue gun (with adult supervision) or strong craft glue. This ensures your sculptures and constructions hold their shape.
- Incorporate Coloring Pages: Elevate your upcycled creations by adding detailed, colored elements. You can print our free robot coloring pages from Colortada, color them with vibrant markers, and glue them onto your cardboard robots to act as control panels or decorative armor. Coloring Advice: Use metallic crayons or gel pens on your robot parts to give them a shiny, machine-like appearance.
9. Printmaking & Stamping Studio
Transform your kitchen into a creative studio with one of the most rewarding art projects for families: homemade printmaking. This activity involves carving custom stamps from simple materials like potatoes, craft foam, or rubber blocks and using them to create unique prints. It’s a fantastic way to teach children about patterns, repetition, and the difference between positive and negative space.
From simple potato stamping for younger kids to more intricate linoleum block printing for teens and adults, printmaking is adaptable for all skill levels. Your family can design custom wrapping paper, greeting cards, or even decorate fabric for tote bags and t-shirts. The process of carving a design and seeing it come to life on paper is a magical experience that encourages planning and precision.
Implementation Tips
- Start with Simple Materials: For an easy entry point, cut a potato in half and let younger children carve simple shapes with cookie cutters or a dull pencil. Craft foam glued to a cardboard block is another safe and effective option for creating detailed stamps.
- Use Even Pressure: When printing, press the stamp down firmly and evenly to ensure a clean, consistent transfer of ink or paint. Rocking the stamp can cause smudging, so practice a straight up-and-down motion.
- Layer Colors and Designs: Encourage experimentation by layering different stamps or using multiple paint colors on a single stamp. This technique can produce beautiful, multi-dimensional artwork. For example, stamp a yellow sun and then stamp a smaller orange circle inside it.
- Integrate Coloring Page Motifs: Find inspiration for your stamp designs in our vast library of coloring pages. For example, use the simple shapes from our free dinosaur coloring pages from Colortada to carve a T-rex footprint or a stegosaurus plate. This bridges the gap between coloring and three-dimensional art creation.
10. Digital Art & Animation Workshop
Dive into the modern world of creativity with one of the most innovative art projects for families: a digital art and animation workshop. Using tablets, computers, and accessible software, your family can explore digital painting, photo editing, or even create a short stop-motion film. This project bridges the gap between technology and traditional art, offering a new canvas for collaborative expression.
This workshop is perfect for a weekend afternoon, teaching valuable tech skills while unleashing artistic potential. Family members can work together on a single digital painting using apps like Procreate or collaborate on a stop-motion video using household objects and a smartphone. The possibilities are limitless, from designing a family logo in Canva to editing photos into fantastical scenes.
Implementation Tips
- Start with Free Tools: You don’t need expensive software to begin. Explore user-friendly and free applications like Sketchpad for drawing, Pixlr for photo editing, or Stop Motion Studio for animation. This lowers the barrier to entry for everyone.
- Follow Guided Tutorials: Find beginner-friendly tutorials on YouTube for the specific software you choose. Following a step-by-step guide together can make the learning process fun and structured, preventing frustration.
- Incorporate Coloring Pages: A fantastic way to start is by digitally coloring. Download a design, import it as a layer in your chosen app, and experiment with digital brushes, gradients, and effects. For inspiration, check out our collection of free animated character coloring pages from Colortada to bring familiar faces to life with digital flair. Coloring Advice: In a digital app, use the "fill" tool for large areas, then select a soft "airbrush" tool to add shading along the edges for a 3D effect.
- Create a Stop-Motion Story: Use toys, clay figures, or even drawings to create a simple stop-motion animation. Take a photo, move the object slightly, and repeat. A fun example is to make LEGO minifigures walk across the table and interact with each other. This teaches the basic principles of animation and results in a fun video you can share.
Family Art Projects — 10-Project Comparison
| Project | Implementation Complexity 🔄 | Resource Requirements ⚡ | Expected Outcomes 📊 | Ideal Use Cases 💡 | Key Advantages ⭐ |
|---|---|---|---|---|---|
| Nature Collage & Scavenger Hunt Art | Low 🔄 — simple prep and collection | Minimal ⚡ — found materials, glue, base | Sensory awareness, creativity, temporary art 📊 | Short outdoor outings, seasonal exploration | Free, encourages outdoor time, sensory development ⭐⭐ |
| Canvas Painting & Art Night | Low–Medium 🔄 — setup + staging | Moderate ⚡ — paints, brushes, canvases | Tangible keepsakes, skill-building, bonding 📊 | Family nights, celebrations, gift projects | Produces displayable art, inclusive for all skill levels ⭐⭐⭐ |
| Collaborative Mural or Large-Scale Art Project | High 🔄 — planning, coordination, design | High ⚡ — large space, many materials, time | Cohesive large artwork, teamwork, planning skills 📊 | Community projects, long-term family collaborations | Teaches collaboration; motivating, impressive final piece ⭐⭐⭐ |
| Handprint & Footprint Art Projects | Very Low 🔄 — immediate and simple | Minimal ⚡ — washable paint, paper/canvas | Sentimental keepsakes, milestone capture 📊 | Babies/toddlers, holiday gifts, quick activities | Fast, meaningful, inexpensive keepsakes ⭐⭐ |
| Tie-Dye & Batik Workshop | Medium 🔄 — technique + safety steps | Moderate ⚡ — dyes, fabrics, protective gear | Wearable art, color-mixing and chemistry lessons 📊 | Summer camps, wearable-craft workshops | Functional wearable results; unique pieces; teaches color theory ⭐⭐⭐ |
| DIY Clay & Pottery Projects | Medium–High 🔄 — technique, drying/firing | Moderate–High ⚡ — clay, tools, possible kiln | Functional or decorative ceramics, tactile therapy 📊 | Classes, therapeutic sessions, multi-session projects | Therapeutic, 3D skills, durable when fired ⭐⭐⭐ |
| Photo Collage & Memory Book Creation | Low–Medium 🔄 — sorting + layout decisions | Moderate ⚡ — photos, adhesives, album or software | Durable personalized keepsake, reflective storytelling 📊 | Family histories, gifts, memory preservation | Highly personal; digital or physical formats; lasting value ⭐⭐⭐ |
| Recycled & Upcycled Art Projects | Low–Medium 🔄 — idea-driven, variable steps | Minimal ⚡ — household waste, adhesives, paint | Sustainable art, creativity, resourcefulness 📊 | Eco-education, budget-friendly crafts | Very low cost; teaches sustainability and creative problem solving ⭐⭐ |
| Printmaking & Stamping Studio | Low–Medium 🔄 — carve/print technique practice | Minimal–Moderate ⚡ — potatoes/foam/blocks, ink | Repeatable prints, pattern and design skills 📊 | Card-making, classroom repeats, pattern projects | Reproducible results from simple tools; good for repetition ⭐⭐ |
| Digital Art & Animation Workshop | Medium–High 🔄 — software learning curve | High ⚡ — devices/software (can be low with free apps) | Shareable digital assets, animation, digital literacy 📊 | Tech-skills education, remote collaboration, portfolio work | No mess, unlimited revisions, highly shareable and scalable ⭐⭐⭐ |
From Inspiration to Creation: Your Family's Next Masterpiece
We've journeyed through ten distinct and engaging art projects for families, from the earthy textures of a nature collage to the vibrant splash of a tie-dye workshop. Each idea, whether it involves upcycling household items into robotic sculptures or transforming handprints into a cherished family tree, offers a unique pathway to creativity and connection. The core takeaway is simple: art is not about perfection; it’s about participation. The true masterpiece isn’t necessarily the canvas hanging on the wall, but the shared laughter, the collaborative problem-solving, and the focused time spent together, away from screens and distractions.
The value of integrating these activities into your family's routine extends far beyond a fun afternoon. These projects are powerful tools for development. A child carefully arranging leaves on their collage is honing fine motor skills. A family debating color choices for a collaborative mural is practicing negotiation and teamwork. A teen learning to use a digital art tablet is gaining valuable technical literacy. These art projects for families serve as a vibrant, hands-on classroom for life's essential skills.
Key Takeaways for Your Artistic Journey
To make these projects truly successful, remember these central principles we've explored:
- Embrace the Process Over the Product: The goal is the shared experience. If the paint spills or the clay sculpture looks more abstract than intended, celebrate it as part of your unique creative story.
- Preparation is Key: A little prep goes a long way. Having materials ready, like sorted recyclables or pre-stretched canvases, means you can dive right into the fun without the friction of a frantic setup.
- Empower Every Artist: Ensure each family member, from the youngest toddler to the most hesitant teen, has a meaningful role. This could be as simple as choosing the color palette or being the designated "glitter expert."
Your Actionable Next Steps
Feeling inspired? Don't let that creative spark fade. Here’s how you can turn inspiration into action this week:
- Choose One Project: Review the list and pick one project that aligns with your family’s interests and the materials you have on hand. The Recycled Art Project is often the easiest entry point.
- Schedule It: Put "Family Art Time" on the calendar. Treating it like any other important appointment ensures it happens.
- Gather Your Supplies: Involve the kids in a "supply scavenger hunt." This builds anticipation and gives them ownership over the activity from the very beginning.
By consistently making space for these creative endeavors, you are not just making art; you are building a family culture rich in innovation, communication, and beautiful, colorful memories. You are teaching your children that their ideas have value and that creating something new is one of life’s greatest joys. The confidence and connection forged during these art projects for families will be the most enduring and valuable creations of all.
Ready to kickstart your next creative session? Colortada offers thousands of high-quality, printable coloring pages that serve as the perfect starting point or a relaxing warm-up for any of these art projects. Find inspiration for your next canvas, patterns for your printmaking, or simply a moment of colorful calm at Colortada.
