Before you even think about putting pencil to paper, let's talk about setting up your workspace. Getting the right tools isn't about spending a ton of money; it's about making your life easier so you can focus on the fun part—actually drawing. The right gear helps you avoid frustration and makes learning how to draw a beautiful flower a much smoother process.
Your Essential Flower Drawing Toolkit for Beginners
To get started, you really only need a few key items. Having a small, curated set of tools gives you the control you need to bring your floral vision to life.
| Tool | Recommended Type | Why It's Important |
|---|---|---|
| Graphite Pencils | A small set (e.g., 2H and 4B) | A hard 2H pencil is perfect for light initial sketches, while a soft 4B is great for adding dark shadows and bold outlines. |
| Drawing Paper | Smooth, heavyweight (80 lb / 120 gsm) | This type of paper can handle erasing and blending without smudging or tearing, giving you a clean canvas. |
| Reference Material | A real flower or a clear photo | A good reference is your best teacher—it shows you the true shape, texture, and light of your subject. |
| Kneaded Eraser | Soft, pliable eraser | This type of eraser is gentle on the paper and can be shaped to lift out fine highlights or correct small details. |
Choosing even basic supplies thoughtfully can completely change the quality of your work. Many of the tools that work well for kids are also perfect for beginners of any age, which you can see in our guide to the best art supplies for kids.
Breaking Down Your Tool Choices
So, why these specific tools? Let's get into it.
Instead of grabbing just any old pencil, having at least two different graphite grades opens up a world of possibilities.
A hard pencil (like a 2H): Think of this as your "ghost" pencil. Use it to lightly map out your flower's basic shapes and guidelines. The lines are faint and easy to erase, so you can build your drawing without leaving messy marks behind. For example, if you're drawing a daisy, you'd use the 2H to sketch the main circle for the center and the larger circle for the petal tips.
A soft pencil (like a 4B): This is your "drama" pencil. Once your initial sketch is in place, you’ll use this one to create deep, rich shadows and confident, bold lines that make your flower pop off the page. For that same daisy, you'd use the 4B to add dark shadows where the petals meet the center.
Your paper choice matters just as much. A smooth, heavyweight drawing paper (look for something around 80 lb or 120 gsm) is sturdy enough to withstand a bit of erasing and blending. Flimsy paper tears and smudges easily, which is the last thing you want to deal with when you're in the creative zone.
Finally, your most important tool is your reference. You can absolutely draw from your imagination, but when you're starting out, working from observation is the fastest way to learn. Grab a real flower from your garden or find a crisp, high-quality photo online. Pay close attention to the little details—the delicate curve of a petal, the way the light hits one side, and the soft shadows created where petals overlap.
The amazing variety of flowers available to artists is always expanding. In fact, the global market for ornamental plants is expected to hit a staggering USD 118.19 billion by 2035. This boom means we have more beautiful and diverse plant forms to inspire our art than ever before.
Sketching the Foundational Shape of Your Flower
Every great flower drawing I've ever done started with a simple shape, not with perfect petals. Forget about getting every line right from the get-go. The real secret is to first map out the flower's core structure. This takes all the pressure off and ensures your final drawing has believable, balanced proportions.
Think about it this way: a classic rose isn't just a bunch of petals. I usually start with a soft oval to define its overall size. Inside that, a small, gentle spiral gives me a guide for that tightly wound center. A cheerful sunflower, on the other hand, is all about that big, bold seed head, so I'll start with a large circle. These initial marks are the skeleton of your drawing, giving you a reliable map for placing every single petal.
This infographic breaks down the simple flow for getting started.
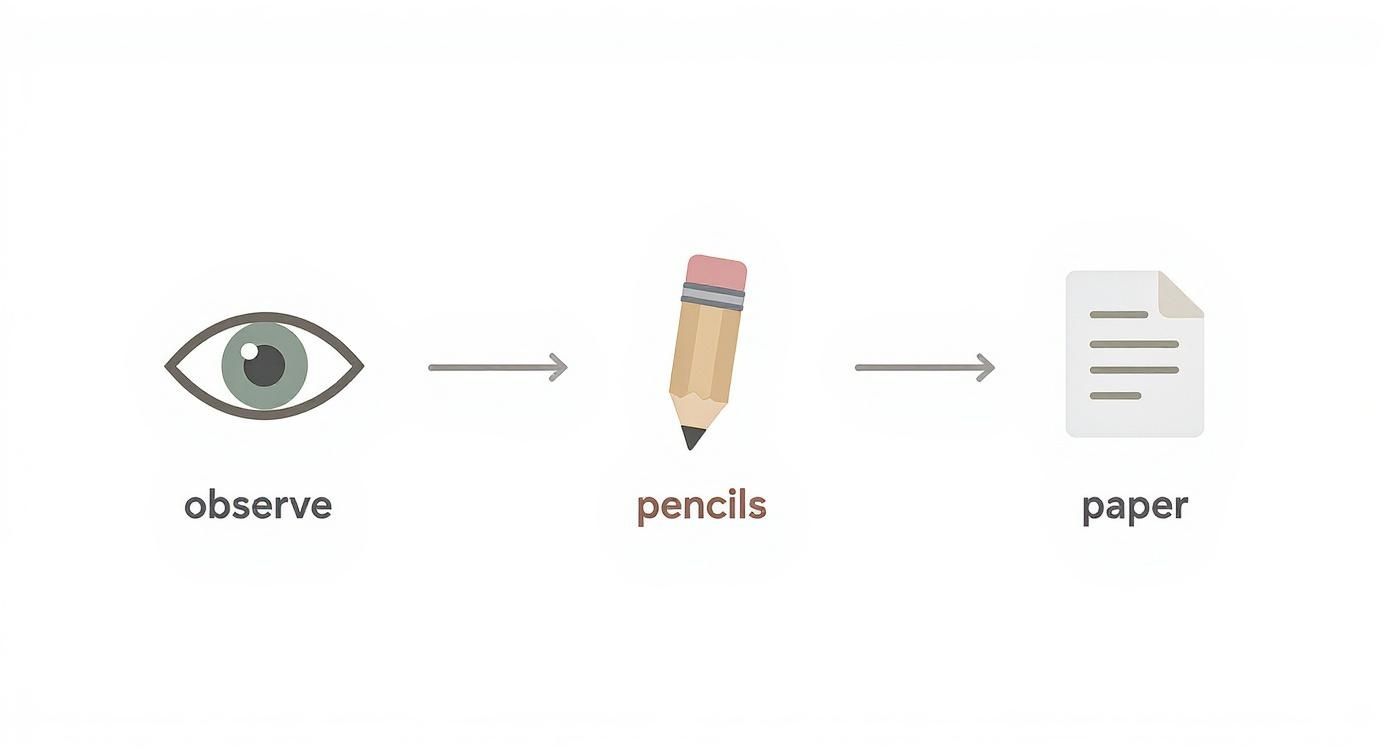
As you can see, the key is observing and preparing your tools before you even make a mark. It's a small step that makes a huge difference.
Building on Your Basic Shapes
Once you have your foundational shape lightly sketched in, it's time to start placing the petals. Use the outer lines of your oval or circle as a boundary—this helps you control the size and shape. Look at how petals overlap in real life; they aren’t just lined up side-by-side. I always sketch some petals in front of others to immediately start building a sense of depth.
Let your pencil lines follow the flower’s natural flow. For a rose, the petals should feel like they are swirling outward from that central spiral. For a sunflower, they radiate straight out from the middle with confidence. Don't press hard or worry about clean lines yet. This part is all about placement and getting the composition right.
The goal here isn't to draw a finished flower immediately but to build a visual blueprint. This foundational step is honestly the most important part of learning to draw a flower that looks and feels real.
It's a great time to be an artist inspired by nature. The global flower bulb market is always growing, with the Asia Pacific region alone showing an annual growth rate of about 23%. For us, that just means an ever-expanding variety of unique flowers to study and draw!
Just like flowers have a basic structure, colors follow simple principles, too. If you want to get a better handle on applying color, check out our guide on how to draw a rainbow.
Bringing Your Flower to Life with Detail
Alright, you've got the basic structure of your flower blocked out. Now comes the fun part—transforming that simple sketch into something that feels real and has personality. This is where we go beyond the basic outline and start carving out the details that give a flower its unique character.
Look closely at your sketch and begin defining the edges of each petal. Petals aren't just flat shapes; they curl, fold, and overlap. Try to capture those subtle movements. Add a few delicate veins running through the leaves and maybe some light texture on the stem. These small touches are what make it feel like a living plant.
Use Line Weight to Create Depth
Here’s a pro tip that makes a huge difference: play with your line weight. This just means changing how hard you press with your pencil to create lines that are thick and dark or thin and light. It’s a simple trick, but it instantly makes your drawing pop.
- Thicker, darker lines: I use these for areas in shadow. Think about where one petal overlaps another or where the flower connects to the stem. This weight makes those parts feel like they are further back.
- Lighter, thinner lines: These are perfect for the edges that are catching the light, like the very top curve of a petal. Lighter lines help bring those elements forward.
The contrast between heavy and light lines is a game-changer for anyone learning how to draw a beautiful flower. It creates a sense of volume and form long before you even think about shading, tricking the eye into seeing a 3D object on a flat page.
Once you’re happy with your new, more detailed lines, it's time for a little cleanup. Gently go back with a kneaded eraser and lift away the initial circles and ovals you first drew. Be patient and careful not to smudge your work. What you'll have left is a clean, confident drawing, perfectly prepped for the final touches of shading and color.
Bringing Your Flower to Life with Shading
If line work is the skeleton of your drawing, shading is what gives it muscle, skin, and soul. This is the part where your flat sketch starts to pop off the page and look like a real, three-dimensional object. It’s what will make your flower look truly beautiful, and honestly, it’s easier than it looks.
Before you make a single mark, ask yourself one question: where is the light coming from? Picture a lamp, a window, or the sun in a specific spot. This simple decision dictates where every shadow and highlight will fall. It's the key to making your shading look intentional and realistic, not just like random smudges.
Shadows, Highlights, and That 3D Pop
With your light source in mind, you can start building up shadows in the places the light can’t touch. Think about the spots where petals overlap or curve underneath, away from the light. Always start with a light touch—you can build up the darkness in layers.
A couple of my go-to techniques are hatching and blending. They’re simple but incredibly effective.
- Hatching is just drawing a bunch of fine, parallel lines. The closer you pack them, the darker the area gets. It’s perfect for creating a bit of texture.
- Blending is what gives you that soft, smooth look. After putting down some pencil, use a blending stump (or even your finger, we've all done it) to soften the lines into a smooth gradient. This works beautifully for the delicate surface of a petal.
The biggest mistake I see beginners make is going too dark, too fast. Remember, it's always easier to add more graphite than it is to erase it. Build your shadows slowly and gently for the best results.
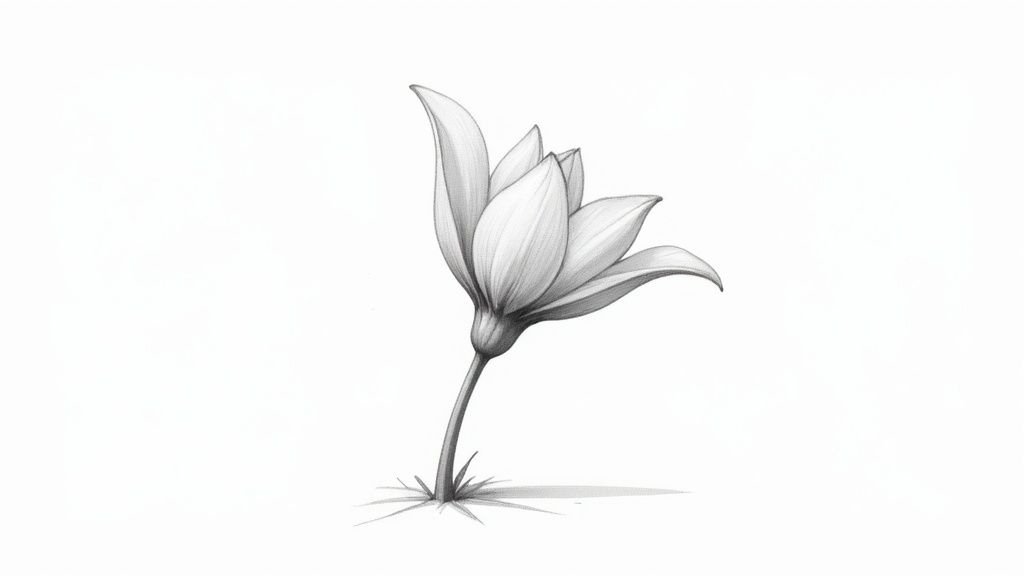
Imagine you're drawing a tulip. The light hits the top edges of the petals, so the deepest part of the flower's cup, where the stem meets the petals, would be the darkest. As you work your way up and out, the shadows get lighter, giving the flower that convincing, hollow shape.
This play of light and shadow is exactly what has captivated artists for centuries. It's no wonder the global cut flower industry was valued at a staggering USD 21.82 billion in 2024. People just love flowers. You can dive deeper into the growth of the floral market on petalandpoem.com. For us artists, this universal appeal just means we have an endless source of inspiration right outside our door.
Bringing Your Flower to Life with Color
This is where the magic happens. Your detailed sketch is about to transform into a vibrant, expressive piece of art, and it's all about color. Whether you're reaching for colored pencils, markers, or even a watercolor palette, this stage is less about rigid rules and more about finding your own style. The secret? Build your colors up gradually, just like you did with the shadows.
https://www.youtube.com/embed/c4BTXgxzkm8
Resist the urge to get that perfect, deep color in a single pass. Seriously, think in layers.
Let's say you're drawing a classic sunflower. Instead of grabbing a single yellow pencil and pressing hard, start with a light, buttery yellow across every petal. Once that's down, pick up a deeper golden yellow and work it into the areas closer to the flower's center, or where one petal tucks behind another.
For that final touch of realism, a hint of light brown or orange right at the base of each petal creates a rich, natural depth. This layering approach gives your colors a vibrancy that one flat color just can't match.
Simple Blending for Smooth Results
Blending is the technique that will give you those soft, seamless transitions between your layered colors, making everything look organic and real. The method really depends on your tools, but the goal is always the same—to soften the lines where different shades meet.
A little blending goes a long way in making your flower look less like a drawing and more like the real thing. Here are a few straightforward methods that work wonders.
Color Blending Techniques for Flowers
| Technique | Best Tool | How to Do It | Best For |
|---|---|---|---|
| Burnishing | Colored Pencils | After layering colors, go over them with a white or very light pencil, pressing firmly. This mashes the waxy pigments together. | Creating a smooth, almost painterly finish on petals. |
| Solvent Blending | Alcohol Markers | Use a colorless blender marker over the edges where two colors meet. The alcohol temporarily dissolves the ink, letting them merge. | Achieving seamless gradients, like the fade on a rose petal. |
| Wet-on-Wet | Watercolors | Lightly dampen the paper with clean water first, then add your colors. The pigments will naturally bleed and soften into each other. | Creating soft, diffused backgrounds or delicate, translucent petals. |
Each tool has its own personality, so don't be afraid to experiment and see which one feels right for you and your flower.
Adding Those Final Sparkling Highlights
Once your base colors are down and beautifully blended, it's time for the final touch: highlights. This is what suggests the satiny texture of a petal or the tiny glint of morning dew. I love using a white colored pencil or a fine-tipped white gel pen for this part.
A few well-placed highlights can do more for realism than hours of blending. Add small dots or thin lines on the highest, most light-exposed parts of the petals to make your flower pop.
If you're hooked and want to dive deeper into applying color, you can find a ton of information in our guide covering various coloring techniques. After you’ve brought a few flowers to life, you might also enjoy exploring the calming benefits of coloring books for a relaxing creative outlet.
Answering Your Questions About Drawing Flowers
It's totally normal to have questions when you're starting out. In fact, it’s a great sign you're on the right track! Let's go through a few common things I hear from new artists, which should help clear up any roadblocks you might be hitting.
What's the Best Flower for a Total Beginner to Draw?
If you're just getting your feet wet, I always recommend starting with daisies or tulips. They're both fantastic for building confidence.
Daisies are great because they're so straightforward—you've got a simple circular center and then petals radiating outwards. It's a perfect exercise for getting comfortable with basic shapes. Tulips are also a winner; their elegant, cup-like form lets you practice creating curves and simple, flowing petals without getting bogged down in tiny details.
How Do I Get My Flower Drawings to Look More Realistic?
Getting that realistic pop comes down to two things I always drill into my students: sharp observation and smart shading. You absolutely need a good reference to work from, whether it's a flower from your garden or a really clear photograph. Study it. Notice how the petals aren't just flat shapes—they overlap, curl, and bend.
Shading is where the magic really happens. Once you decide where your light is coming from, be bold with your shadows. It’s that strong contrast between light and dark that convinces the brain it’s looking at something with real depth, not just lines on a page. If you're drawing from life, keeping your model fresh is key. A few essential flower care tips can make a huge difference during longer drawing sessions.
What Are the Biggest Mistakes People Make?
A classic beginner trap is drawing each petal as a separate, flat shape, almost like a cookie-cutter cutout. Real petals have life to them! They overlap and create layers, so you have to think in terms of what's in front and what's behind to build that sense of depth.
Another common slip-up is outlining the entire flower with one harsh, uniform line. That tends to flatten everything out and make it look more like a cartoon.
Pro Tip: Vary the weight of your lines. Use lighter, delicate strokes for edges catching the light and press a bit harder for darker lines in the shadows or where petals overlap. This is one of the quickest ways to instantly make your drawings feel more dimensional.
Here at Colortada, we're passionate about making art a fun and approachable part of everyone's life. Check out our massive library of free coloring pages to sharpen your skills or just unwind. Find your next creative escape at https://www.colortada.com.
