Learning how to draw a skeleton head is way easier than it looks. The secret? It's all about starting with simple, manageable shapes. My most practical advice is to begin with a large circle for the main part of the skull, then attach a blocky shape for the jaw. From there, you just pop in some circles for eye sockets and an upside-down heart for the nose. Once you get the hang of these basic building blocks, you'll be sketching cool-looking skulls in no time.
Breaking Down the Basic Skull Shapes
Before you even touch pencil to paper, let's take a second to really look at a skull. It might seem intimidating with all its curves and angles, but don't worry. Think of it less like a complex anatomy lesson and more like playing with building blocks. All you really need to get started is a pencil, some paper, and a good eraser.
When you learn to see these simple shapes first, the whole drawing process clicks into place. You're essentially creating a solid, simple map of the skull before you even think about adding the cool details. This actionable insight makes everything that comes after so much easier.
The Building Blocks of a Skull
Let’s zero in on the key shapes we'll be using. Once you can spot these, your confidence will shoot right up. It's a fantastic method that applies to drawing almost anything—we even use this same idea in our guide on how to draw Pokemon characters, where all those wild creatures also start with basic forms.
To make this super clear, I've put the four essential shapes into a quick table.
Essential Shapes for Your Skeleton Head Drawing
| Skull Part | Simple Shape to Draw | Actionable Tip |
|---|---|---|
| Cranium | A Large Circle | This is the main part of the skull. Don't stress about making it a perfect circle! A slightly squashed oval works great too. |
| Jaw | A Simple Block | Attach this squared-off shape to the bottom of your circle to form the jaw and chin. Think of a "U" shape with corners. |
| Eye Sockets | Two Circles | These create those classic spooky, hollow eyes. Try to place them evenly on either side of a central guideline. |
| Nose Cavity | An Upside-Down Heart | A small, inverted heart is the perfect, easy shape for the nose hole. Position it just below and between the eye sockets. |
Think of these four shapes as your starting kit. Every great skeleton head drawing, no matter how detailed, begins with this simple foundation. It’s a foolproof way to get the proportions right from the very first line.
Setting Up Your Creative Workspace
Before we put pencil to paper, let's get your drawing space ready. You don't need a professional art studio to create an awesome skeleton head drawing; a few simple tools and a comfortable spot are all it takes to get the creative vibes flowing.
If you’re drawing on paper, a basic HB pencil is your best friend for the initial light sketch. Once you have the shapes down, a darker 2B pencil is perfect for making those lines bold and final. And here's an actionable tip: grab a kneaded eraser. It's a game-changer because you can mold it to a fine point to lift out tiny mistakes without smudging everything.
Your Go-To Drawing Tools
Here’s a quick checklist of what I recommend having on hand:
- Pencils: An HB for your light sketch and a 2B for darker, final lines.
- Eraser: A kneaded eraser is ideal for clean corrections.
- Blending Stump: This is optional, but it's fantastic for smudging graphite to create smooth, spooky shadows.
- Coloring Tools: Colored pencils (especially white, cream, and brown) or fine-tip markers are great for adding the final touches.
Working digitally? No problem. Most drawing apps have standard pencil and airbrush tools that will give you the same effects.
A well-lit space is just as important as your tools. Good lighting helps you see subtle details and values accurately, preventing eye strain during longer drawing sessions.
For any artist, seeing your work clearly is non-negotiable. If you want to really dial in your creative zone, check out this complete guide to home office lighting setup for some great ideas. Getting these basics right makes a huge difference.
Bringing Your Skeleton Head to Life
Alright, you've got your supplies ready, so let's get to the fun part: turning that blank page into a super cool skeleton head. We'll start with some basic shapes and build up from there, piece by piece. Don't stress about getting it perfect on the first try—drawing is all about building up your creation.
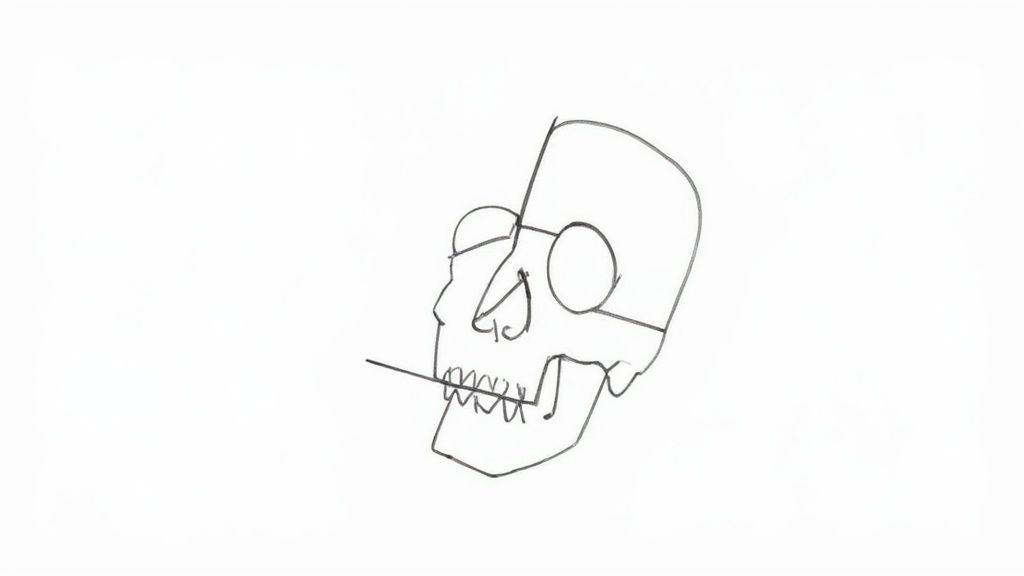
First things first, grab your HB pencil and lightly sketch a circle for the main part of the skull. Below that, add a squared-off U-shape for the jaw. Now, draw a faint vertical line straight down the middle of both shapes and a horizontal line across the center of the circle. These are your secret guides! They'll help you make sure the eyes and nose end up in the right spot so everything looks balanced.
Placing the Key Features
With your guidelines in place, it's time to start adding the features that make a skull look like a skull. This is where you can decide if your skeleton is going to be spooky, silly, or just plain awesome.
- Eye Sockets: On that horizontal line you drew, sketch in two big circles for the eye sockets. Practical example: Imagine drawing sunglasses on your circle—the eye sockets sit right where the lenses would be.
- Nasal Cavity: Find the vertical guideline and, just below where it crosses the eye line, draw a small, upside-down heart shape. That’s the nose!
- Brow Ridge: Just above the eye sockets, add a slightly curved line. This simple line creates the forehead and instantly gives your skull more depth.
Using simple shapes and guidelines is a classic artist's trick. Way back in 1956, an artist named Andrew Loomis wrote about this very technique in his famous book, Drawing the Head and Hands. His method of placing the eye line halfway down the head is still taught in about 70% of art schools today! You can learn more about how artists use anatomy over at the Portrait Society of America's website.
This little graphic shows the basic flow we're following—from a light sketch to a clean, final outline.
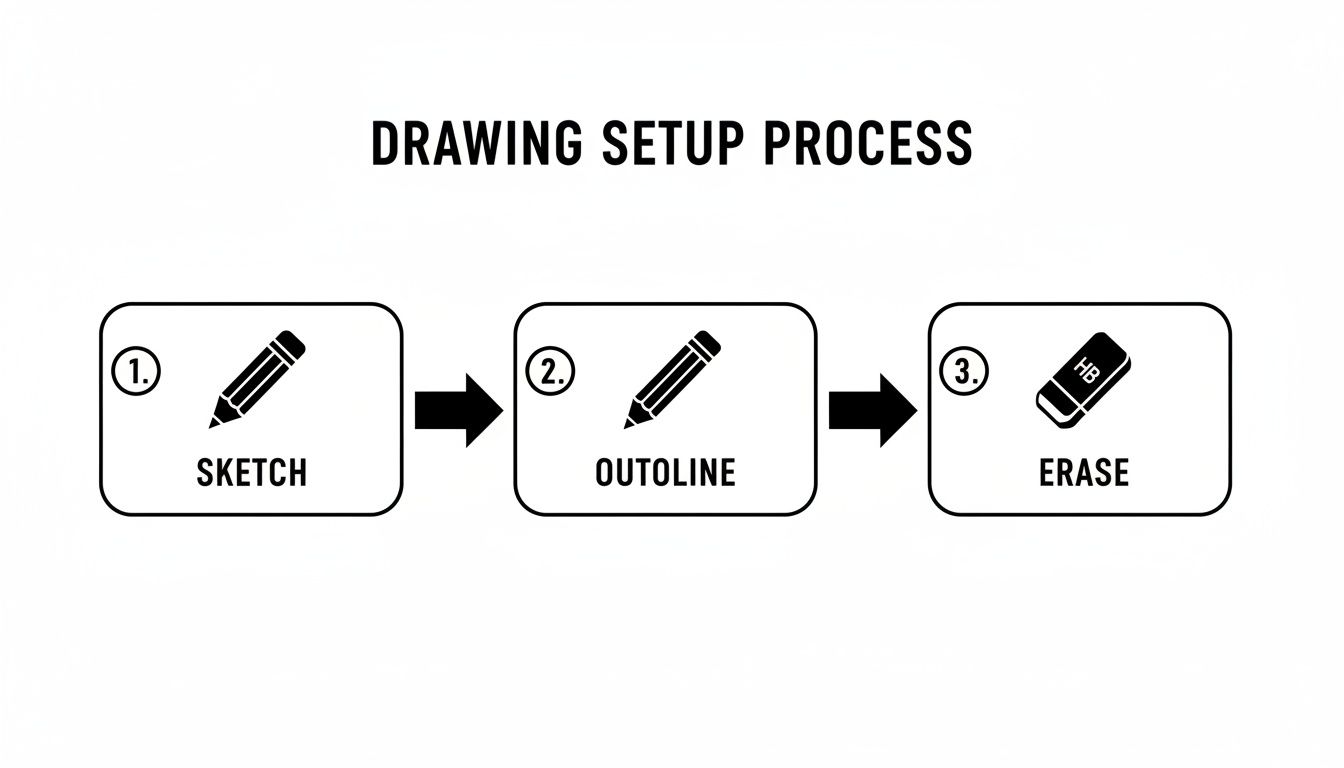
This process helps make sure your final drawing looks polished and not messy with leftover sketch lines.
Adding the Teeth and Final Details
Let’s give this skeleton a grin. Instead of trying to draw every single tooth perfectly, just think of them as a row of little marshmallows or tic-tacs. It's way easier and looks more natural. Draw two horizontal lines where the mouth should be, then add small vertical lines to divide the space into individual teeth.
Actionable Tip: Avoid making the teeth perfectly straight and even. A few little chips, slight slants, and tiny gaps will make your skeleton head look much more authentic and interesting. For example, make one tooth slightly shorter than the rest or add a small 'v' shaped chip on another.
For the finishing touches, you can add a few hairline cracks on the forehead or cheekbones to make your skull look ancient and weathered. Once you're happy with how everything looks, trace over your best pencil lines with a darker 2B pencil. Then, carefully use your eraser to get rid of all those initial guidelines.
And just like that, you've built a complete skeleton head from a few simple shapes
Bringing Your Skeleton to Life with Shading and Color
An outline is a great start, but shading and color are what really give your skeleton head personality and make it feel three-dimensional. Without them, your drawing can look a bit flat. The goal here is to make it feel like it's popping right off the page.
You don’t need anything fancy—a simple pencil is all it takes to begin. The first thing I always ask myself is, where is the light coming from? If you imagine a light source from the top, the forehead and cheekbones will catch the most light and be the brightest. The parts that curve away, like the deep eye sockets and the space under the jaw, will naturally be the darkest.
Key Takeaway: Shading isn't just about making things dark; it's about creating contrast between light and shadow. That contrast is the visual trick that tells our brains we're looking at a 3D object.
Choosing Your Color Palette
When you're ready to add color, you've got some fantastic options. The path you choose here will dramatically change the entire mood of your skeleton head. Here are some actionable coloring tips:
- Classic Aged Bone: For that timeless, slightly spooky vibe, think in layers. Practical example: Start with a light cream or ivory colored pencil for the base coat. Then, use a light brown or gray to gently shade the eye sockets, jawline, and nose cavity. To create a highlight, use a white colored pencil on the forehead and cheekbones. The secret to a realistic texture is patience—build up that color slowly.
- Vibrant Sugar Skull: If you want something more festive and expressive, go bold! Use bright magentas, turquoises, and sunny yellows to fill in intricate patterns and floral designs. Practical example: Use a fine-tip black marker to draw swirls and dots on the forehead and chin. Then, fill in shapes like flower petals around the eye sockets with contrasting colors like orange and blue.
This vibrant style has deep cultural roots. In Mexico, skull art from Día de los Muertos has been a powerful symbol since Aztec times, influencing everything from folk art to modern design. Today, skeleton motifs appear in about 15% of all Halloween merchandise, which shows just how widespread this imagery has become.
To really get a handle on how colors play together in your drawings, it's worth brushing up on the foundational principles of colour theory.
Ultimately, whether you stick with simple pencil shading or break out a full spectrum of color, these techniques are what breathe life into your art. For more detailed tutorials, check out our guide on essential shading techniques to practice and really sharpen your skills.
Give Your Skeleton Some Personality
Okay, so you've nailed the basic skeleton head. Awesome! Now for the really fun part—making it your own. Think of that skull you just drew as the starting point, a blank canvas ready for a serious dose of personality.
Artists have been adding their own flair to skulls for centuries. It's not a new idea, but it’s one that never gets old. In fact, this concept even has a scientific side; the first-ever facial reconstruction from a skull happened all the way back in 1898. If you're curious about that cool bit of history, you can read more about facial reconstruction on Sage Journals.
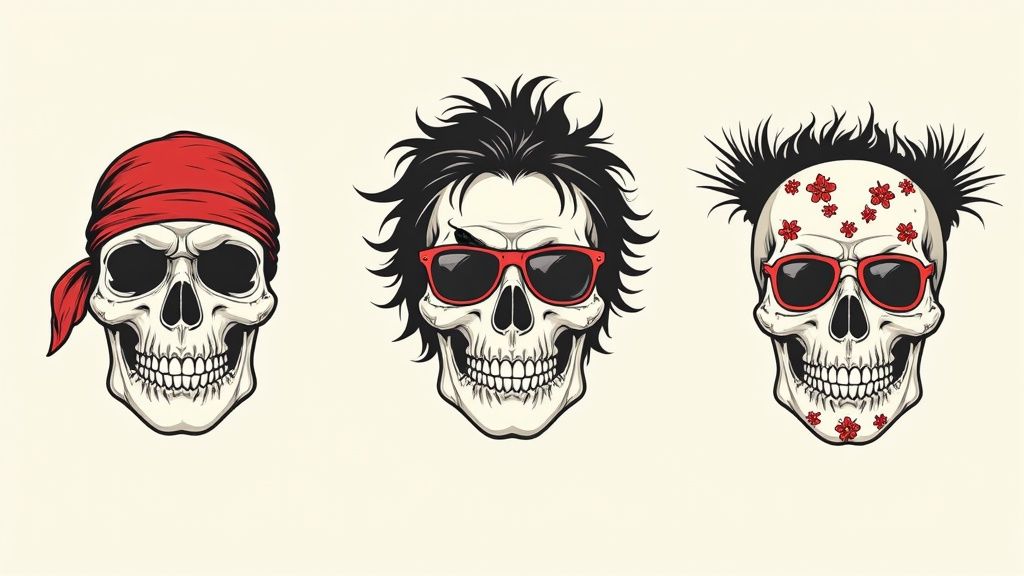
Quick Ideas to Make Your Skull Unique
You don't need to make massive changes to give your drawing a whole new vibe. Just a few small accessories or a tweak to the expression can completely transform its mood. Here are a few practical examples to try:
- Pirate Skeleton: This one's a classic for a reason. Just tie a bandana across the forehead, pop a cracked eyepatch over one eye socket, and maybe add a gold hoop earring hanging from where the ear would be. Arrr-tistic!
- Rockstar Skeleton: Give it some attitude with a pair of cool, dark sunglasses. You can even add a few spiky lines coming off the top of the skull to hint at a wild hairdo.
- Laughing Skeleton: To make your skeleton look happy, just drop the jawline a bit lower and curve the ends of the toothy grin upwards. It instantly creates a big, joyful laugh.
Here's an actionable insight: the magic is all in the little details. Just angling the brow ridge down a tiny bit can make a neutral skull look angry. Play around with these small adjustments and see what kind of character you can bring out.
Once you’ve perfected your custom design, it’s time to break out the colors and bring it to life! If you're looking for more inspiration or just want some cool designs ready to go, check out our collection of free skeleton coloring pages.
Got Questions? Let's Get Your Skeleton Drawing Right
Even with the best instructions, you're bound to run into a few tricky spots when learning how to draw a skeleton head. It happens to everyone! Let's walk through some of the most common questions and find some simple fixes to get your drawings looking awesome.
How Do I Get the Proportions to Look Right?
This is probably the biggest hurdle for new artists, but there's a practical trick. Start your skull with a big circle, then lightly sketch a vertical line right down the middle and a horizontal line across the center. Think of it like a crosshair.
This simple grid is your best friend. The horizontal line is the perfect guide for placing the eye sockets so they're nice and level. The bottom of the nose opening? That should land about halfway between your eye line and where the chin will be. Using these guides from the very beginning is a pro-level move that keeps everything from looking wonky.
How Can I Make My Skeleton Drawing Look 3D Instead of Flat?
Shading is your secret weapon here. It’s what transforms a simple outline into something that feels solid.
Before you start, just imagine where your light is coming from. For example, if light comes from the top right, the areas tucked away from the light—like the deep left eye socket, the hollows under the left cheekbone, and the curve of the left jaw—will be the darkest. The parts facing the light, like the forehead and the bridge of the nose, will be the lightest. You don't need fancy tools; even a little shading with a regular pencil can add a ton of depth.
My Skeleton Head Looks Kind of "Cartoonish" or Flat. What's Going Wrong?
If your drawing is looking a bit flat, chances are you're using the same line pressure for everything. A great drawing uses a mix of line weights.
Try making your main outline and the lines in the shadowy spots darker and thicker. Then, use lighter, thinner lines for smaller details like the individual teeth or tiny cracks in the bone. As a practical exercise, try drawing one skull where the outline is bold (using a 2B pencil) and another where every line is thin (using an HB). You'll immediately see the difference in depth.
Another thing to remember is that a real skull isn't a perfect, smooth sphere. Giving the forehead, cheekbones, and jawline subtle curves and bumps will immediately make your sketch feel more realistic and less like a flat symbol.
Ready to put what you've learned into practice? Colortada has a massive collection of fun and spooky coloring pages to keep your creativity flowing. Download your favorite skeleton outlines for free and keep on drawing
