That sinking feeling when you spot a waxy, colorful streak on a brand-new t-shirt is practically a rite of passage for parents. But don't despair—rescuing that piece of clothing is probably easier than you think. The trick is to tackle the crayon in stages: first the wax, then the color.
Your Guide to Crayon Stain Removal Emergencies
Creative playtime is messy, and that's okay. But when a masterpiece ends up on fabric instead of paper, your first reaction might be to toss it straight into the hamper. Before you do, it helps to understand what you're dealing with.
Crayon stains are a double-whammy: wax and pigment. The paraffin wax is designed to go on smooth and stick, which is great for paper but terrible for fabric fibers. It clings on tight, and a standard wash cycle often just melts and spreads it around. This guide is your complete playbook for handling any crayon catastrophe.
Why Acting Fast Is Key
When it comes to a fresh crayon mark, time is everything. The longer that wax and pigment have to settle into the fabric, the more stubborn the stain becomes. Responding quickly stops the stain from setting permanently.
Think of it like laundry first-aid. For example, if your child gets a red crayon smudge on their sleeve while coloring, getting to it right away prevents the wax from melting deeper into the fibers, which can happen if they sit in a warm car seat or leave the shirt in a sunny spot on the floor.
Coloring Advice: An easy way to prevent laundry emergencies is to channel that creative energy into mess-free activities. Encourage kids to try shading techniques, like using the side of a peeled crayon for broad strokes on paper, which keeps the coloring focused and fun.
When you find a fresh stain, don't just throw it in the wash. Follow this simple plan to stop the stain in its tracks.
Quick Action Plan for Fresh Crayon Marks
| Step | Action | Why It Works |
|---|---|---|
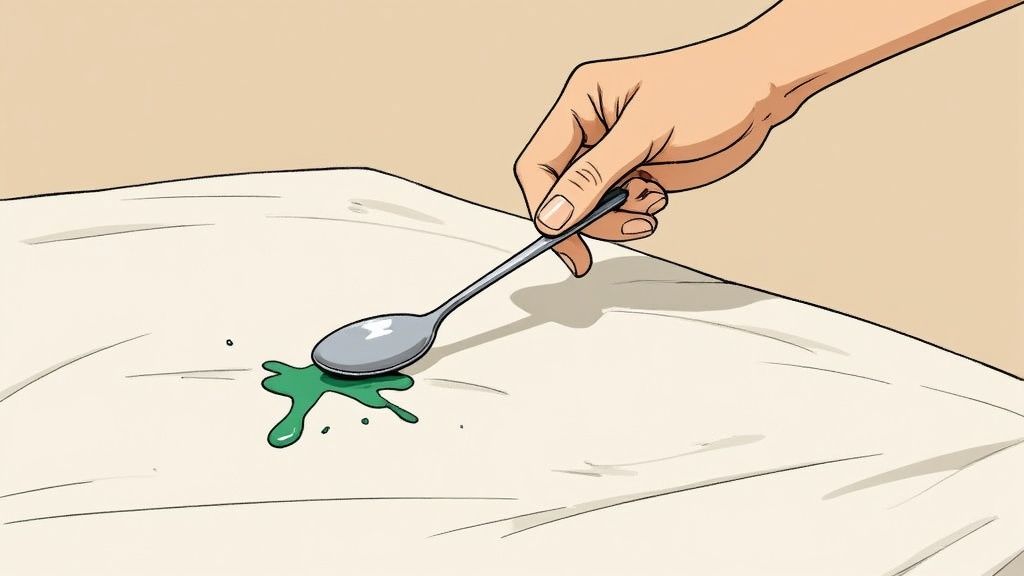
| 1. Scrape | Use a dull knife or the edge of a credit card to gently lift off excess wax. | This removes the bulk of the problem before it can be ground deeper into the fabric. |
| 2. Blot | Place the stained area between two paper towels and press with a warm iron. | The heat melts the remaining wax, and the paper towels absorb it away from the fabric. |
| 3. Pre-Treat | Apply a drop of liquid dish soap or stain remover to the remaining color stain. | This targets the pigment left behind after the wax is gone. |
This three-step approach tackles both parts of the stain, setting you up for a successful wash later on.
Understanding the Basic Principles
No matter which specific method you end up using, the strategy for getting crayon out of clothes always boils down to a two-part attack.
- First, get rid of the wax. This is the physical, waxy layer sitting on the surface of the fabric.
- Second, treat the color. This is the pigment stain that the wax leaves behind.
By tackling the problem in that order, you’re not just smearing the mess around. You’re systematically breaking down the stain, which makes dealing with the leftover color a much simpler task.
Gathering Your Stain-Fighting Tools
Before you jump into treating that colorful, waxy masterpiece on your child's t-shirt, it pays to get organized. Having the right tools ready to go makes the difference between a quick fix and a frustrating afternoon. Luckily, you probably have most of what you need already scattered around the house.
First, you'll need something to scrape off the excess crayon. A dull butter knife or the edge of an old gift card works perfectly for this—you want something with a firm edge that won't accidentally cut the fabric. You’ll also need some paper towels or a brown paper bag and an iron. This simple combo is surprisingly effective at lifting the melted wax right out of the clothing fibers.
Choosing Your Cleaning Agent
After you've removed the solid wax, you're left with the oily color stain. This is where a good cleaning agent comes into play. You have a few great options, and each works in a slightly different way.
- Grease-Cutting Dish Soap: A little squirt of a powerful dish soap like Dawn is a fantastic choice. It’s formulated to break down grease and oil, which is exactly what the paraffin wax in crayons is made of.
- WD-40: It might sound strange, but this garage staple is a solvent that’s incredibly good at dissolving that stubborn waxy residue, making it much easier for your detergent to wash the pigment away.
- Laundry Pre-Treater: Of course, a dedicated stain remover is designed for this kind of work. These products are formulated to tackle a wide range of tough stains, including both oils and dyes.
Effective cleaning products are a big deal in households everywhere. The stain remover market alone was valued at an impressive $24.98 billion in 2024. That shows just how much we all rely on these tools to save our favorite clothes. You can see more about the stain remover market over at Straits Research.
And if you're looking to prevent future laundry emergencies, picking the right art supplies can make a world of difference. For some great ideas, take a look at our guide to the best art supplies for kids.
Lifting Set In Crayon Stains from Fabric
We’ve all been there. A crayon mark that’s had a little too much time to get comfortable in the fabric won't come out with a simple pre-treatment. For those stubborn, set-in stains, you’ll need a more targeted approach. This is where a trusty iron and some paper towels come in to save the day.
The whole idea is to gently re-melt the crayon wax so you can pull it out of the fabric. Start by laying the stained area flat on your ironing board. Slip a plain paper towel or a piece of a brown paper bag underneath the stain to protect your board from any waxy transfer.
Next, place another clean paper towel right on top of the crayon mark.
The Melt and Lift Technique
Grab your iron and set it to a low heat setting. Make sure the steam function is turned off—we want dry heat for this.
Gently press the warm iron over the paper towel that's covering the stain. You'll start to see the paper towel absorb the colorful, oily wax almost immediately. It’s pretty satisfying to watch.
The key here is to keep moving to fresh spots on the paper towels, both on top and underneath. Once a section of paper is saturated with wax, it can't absorb any more. Just keep shifting the garment over a clean area of the paper and continue pressing until no more crayon transfers from the fabric.
Practical Example: Imagine a bright blue crayon streak on the sleeve of a cotton t-shirt. As you press the iron, you'd see the blue wax seep into the paper. You’d lift the iron, shift to a clean piece of paper, and press again, repeating until the paper comes away clean.
Once the wax is gone, you'll likely still see a colored stain left behind. The next steps are all about tackling that pigment.
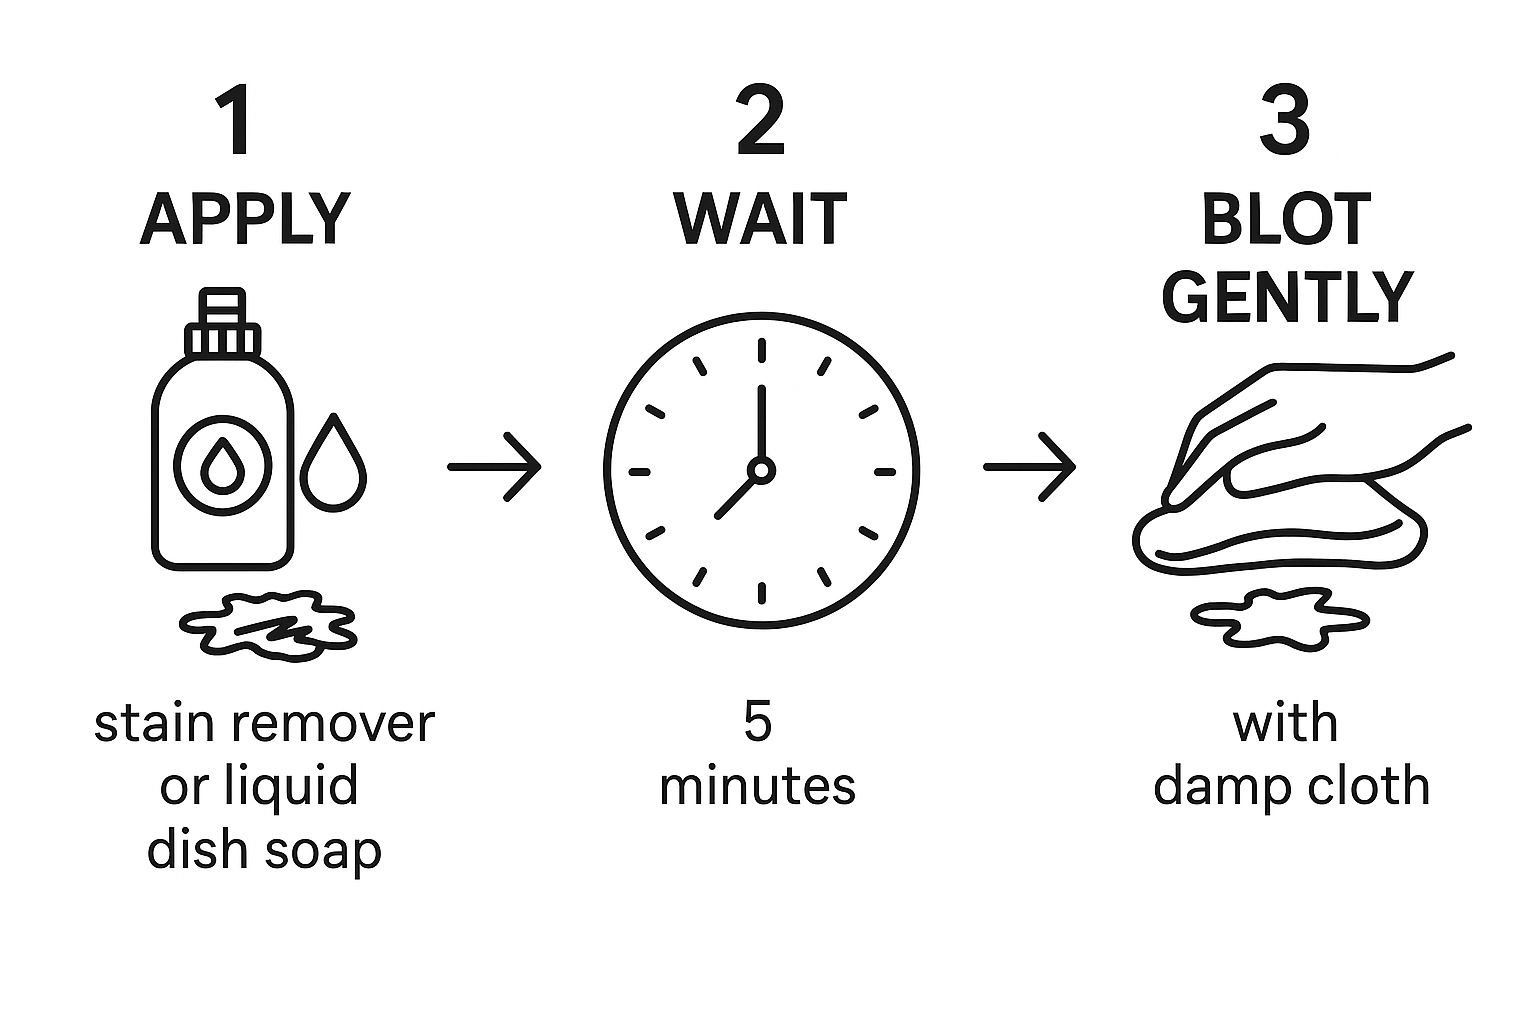
After you've lifted out all the wax, it’s time to pre-treat the remaining color. Apply your favorite stain remover, let it sit for a few minutes, and then blot it gently before tossing it in the wash. This two-part process—tackling the wax first, then the pigment—is the secret to success.
If you've done everything right and stains are still an issue, it might be worth investigating why your washing machine might not be getting rid of stains for other potential laundry problems. But for now, you're ready to wash the item as usual and see your hard work pay off.
Solving the Melted Crayon in the Dryer Disaster
It’s a heart-sinking moment for any parent. You open the dryer, expecting warm, clean clothes, and are met with a waxy, colorful catastrophe. A stray crayon has melted all over everything.
Before you panic, know that this is salvageable. The key is to handle it in two separate stages: first, deal with the dryer drum, and then tackle the clothes.
Getting the Crayon Out of Your Dryer Drum
You have to clean the inside of your dryer first. If you skip this, you’re just going to transfer that waxy residue onto your next few loads of laundry, and the cycle of frustration will continue.
Believe it or not, a can of WD-40 is your best friend here. It’s brilliant at breaking down waxy, greasy messes.
- First, make sure the dryer is completely cool.
- Spray a small amount of WD-40 onto an old rag or paper towel—never directly into the drum.
- Start wiping down the inside of the drum. You’ll see the crayon start to dissolve and lift almost immediately.
- Keep wiping with clean sections of the rag until every last bit of waxy color is gone.
- Once the crayon is cleared, take a new cloth with some warm, soapy water and wipe down the entire drum again to remove any oily residue from the WD-40. Let it air dry.
Actionable Insight: This cleanup step is absolutely non-negotiable. Taking ten minutes to do this properly will save you hours of re-washing clothes down the road. It’s a small investment of time for a huge return in clean laundry.
Rescuing the Crayon-Stained Clothes
With the dryer clean, you can finally turn your attention to that pile of clothes. For a disaster of this scale, a simple wash won’t cut it. You need to pre-soak.
Fill a large basin, bucket, or your bathtub with the hottest water the fabric can safely handle (check those care labels!). Add a good oxygen-based cleaner, like OxiClean, and let the clothes soak for several hours, or even overnight if the stains are really bad. This gives the cleaner time to break down both the wax and the colorful pigments.
Considering the wax crayons market was valued at USD 3.35 billion in 2023, it’s clear these little sticks of color are a staple in almost every home with kids. You can find more details on the growth of the crayon market on TechSci Research.
After the long soak, run the clothes through a regular wash cycle using your usual detergent. The most important part? Check every single item for lingering stains before you even think about putting them back in the dryer. If you heat them again, any remaining wax will set for good.
Match Your Method to the Fabric
The iron-and-paper-towel trick is my go-to for tough fabrics like cotton and denim, but I’ve learned the hard way that you can't treat all materials the same. Figuring out how to get crayon out of clothes really comes down to what you're working with. A technique that rescues a pair of jeans could spell disaster for a favorite wool sweater.
For instance, a sturdy cotton shirt can usually take the gentle heat needed to lift the wax right out. But when you’re staring at a crayon masterpiece on a silk blouse, you need a completely different game plan.
Tackling Synthetics and Delicates
Synthetic fabrics like polyester and nylon are especially tricky because they just can't handle high heat. An iron, even on a low setting, can literally melt the fabric’s fibers, fusing the waxy stain into the garment forever. With these, it's best to avoid heat entirely.
A solvent-based approach is a much safer bet.
Polyester & Nylon: Start by gently scraping off any crayon chunks. Then, dab a small amount of WD-40 or rubbing alcohol onto a clean cloth and blot the stain. This breaks down the wax without needing any heat. I can't stress this enough: always test it on a hidden spot first, like an inside seam.
Wool & Silk: These natural fibers are incredibly delicate, so forget about any kind of vigorous rubbing. Scrape off what you can, then blot the area with a cloth dampened with a little diluted dish soap. Afterwards, wash it in cool water using a detergent made specifically for wool or delicates.
Actionable Insight: The most important thing to remember for delicates is no heat and no harsh scrubbing. Patience and a gentle blotting motion are your best friends here. They'll save you from stretching, shrinking, or permanently damaging the fibers.
I've put together a quick reference table to help you choose the right approach at a glance. It's a lifesaver when you're in a hurry and need to act fast.
Crayon Removal Techniques by Fabric Type
| Fabric Type | Recommended Method | What to Avoid |
|---|---|---|
| Cotton & Denim | Scrape excess, then use the warm iron and paper towel method. Pre-treat with dish soap before washing. | High heat directly on the fabric; harsh scrubbing that can fade color. |
| Polyester & Nylon | Scrape excess, then blot with a solvent like WD-40 or rubbing alcohol. Wash in warm water. | Any direct heat from an iron. This can melt the fibers and set the stain. |
| Wool & Silk | Gently scrape off surface wax. Blot with a cloth dampened in a mild dish soap and water solution. | Hot water, heat, and vigorous rubbing. These can cause shrinking, stretching, and permanent damage. |
| Blends (e.g., Cotton/Poly) | Scrape excess. Start with a solvent-based spot treatment first. Use the iron method only on a very low heat setting as a last resort. | Assuming it can handle the same heat as pure cotton. Always err on the side of caution. |
Knowing these little distinctions is what makes all the difference. The right technique not only gets the crayon out but also keeps the garment in great shape. Before you do anything, take 5 seconds to check the care label—it’s the simplest step and can prevent a costly mistake.
Proactive Tips for Stain-Free Coloring
Let's be honest, the best way to get crayon out of clothes is to stop it from getting there in the first place. A little prep work before art time can save you a mountain of laundry-related stress later, letting you focus on the fun.
Setting up a few simple routines can make all the difference. The classic "art smock" is a classic for a reason! It doesn’t have to be anything special—an old, oversized t-shirt of yours works just fine. The goal is to create a simple barrier between the creative chaos and their actual outfit.
Create a Crayon-Friendly Zone
Where your kids create is just as important as what they wear. Whenever possible, guide them toward easy-to-clean surfaces. Think a small plastic art table or even the kitchen's vinyl floor, rather than the brand-new living room rug.
Having the right gear on hand also helps immensely.
- Washable Crayons: For the little ones, washable crayons are an absolute lifesaver. They're made with a formula that's specifically designed to come right out in a normal wash cycle.
- Art Trays: Something as simple as a baking sheet with a raised edge is perfect for containing runaway crayons and keeping the artwork (and the marks) in one spot.
Coloring Advice: Teach your kids fun ways to use their art supplies that also minimize mess. For example, show them how to create textures by placing a leaf under their paper and coloring over it. This keeps the focus on the page and away from furniture or clothes.
Choosing the right art supplies for two year olds can dramatically cut down on the potential for mess. Taking these small, proactive steps means you can encourage their creativity without constantly worrying about the aftermath.
For more great ideas on keeping clothes looking their best, check out these simple habits to prevent stains and keep your laundry fresh.
Got Crayon Stain Questions? We've Got Answers
Even with the best techniques, some crayon messes can leave you wondering what to do next. Let's tackle some of the most common questions that come up when you’re dealing with a waxy work of art on your laundry.
Can I Just Use Vinegar or Baking Soda?
It's tempting to reach for household staples like vinegar and baking soda, and while they're great for a lot of cleaning jobs, they don't quite cut it for crayon stains. The real problem here is the paraffin wax in the crayon, which is oil-based and couldn’t care less about water.
Vinegar and baking soda just can't break down that greasy, waxy bond. You really need something that can dissolve the oil first. Think of a solvent like WD-40 or a grease-fighting dish soap. Once you’ve used one of those to get rid of the wax, your regular detergent can finally get in there and wash away the leftover color pigment.
What If a White Crayon Stained Black Jeans?
The game plan is pretty much the same, but you need to be extra cautious about making the dark fabric fade. First, carefully scrape off any excess wax sitting on the surface. Then, try the warm iron and paper towel trick to gently lift out as much of the wax as you can.
Before you go all-in with a stain remover, always test it on a hidden spot, like the inside of a hem or seam. Just dab a little dish soap or your chosen product, wait a few minutes, and make sure it doesn't pull any color from the fabric. If you get the all-clear, treat the stain, let it work its magic for about 20 minutes, then wash and let it air dry.
Actionable Insight: The dryer is your enemy when you're not sure a stain is gone. That heat will lock in any leftover wax or color for good, so double-check that the mark has vanished before you even think about machine drying.
Help! A Crayon Melted All Over a Graphic Tee! Is It a Lost Cause?
Not at all, but put the iron away for this one. High heat can easily melt or warp the plasticky ink used for most graphic prints, which would completely ruin the design. So, for any crayon that's on the graphic itself, skip the "Melt-and-Lift" method.
Your best bet here is to apply a small amount of liquid dish soap directly onto the waxy spot. Use your finger or a soft cloth to gently work it into the stain on the print. Let it sit for around 30 minutes, and then toss the shirt in a cool wash cycle. It might take a couple of tries, but this gentle approach is your safest bet for saving the shirt and the design.
Are Washable Crayons Actually Easier to Get Out?
Oh, absolutely. They’re a game-changer. Washable crayons are made with a special formula designed to break down in water and detergent, which seriously cuts down on laundry headaches.
If the stain is fresh and from a washable crayon, you can usually skip all the scraping and ironing. Just dab a little liquid laundry detergent on the spot, gently rub it in, and wash the item in the warmest water the care label recommends. It’s that simple. They really do make cleanup a whole lot easier.
Here at Colortada, we think creativity should be fun, not a chore. To keep your little artists busy without the mess-related stress, check out our massive library of free, printable coloring pages. You're sure to find their next masterpiece at https://www.colortada.com.
