As the world bursts into color, it's the perfect time to bring that vibrant energy indoors with creative activities. Spring offers a treasure trove of inspiration, from blooming flowers to buzzing bees, making it an ideal season for hands-on learning and exploration. This guide provides a curated list of engaging spring arts and crafts for preschoolers, each designed to be fun, educational, and easy to set up with minimal fuss.
Parents, teachers, and caregivers will find everything needed to spark a child's imagination. We've packed each project with actionable insights, clear step-by-step instructions, and practical tips to help develop crucial fine motor skills, encourage creativity, and make lasting memories together. You will find fresh ideas for everything from Paper Plate Flowers and Butterfly Wing Painting to Nature Collages and Handprint Animals.
Throughout the article, we will also sprinkle in specific coloring advice to enhance each activity, helping little artists explore color mixing and shading techniques. Forget generic ideas; this resource is focused on specific, implementable projects that celebrate the season. Let's dive into a world of color, texture, and springtime joy
1. Paper Plate Flower Crafts
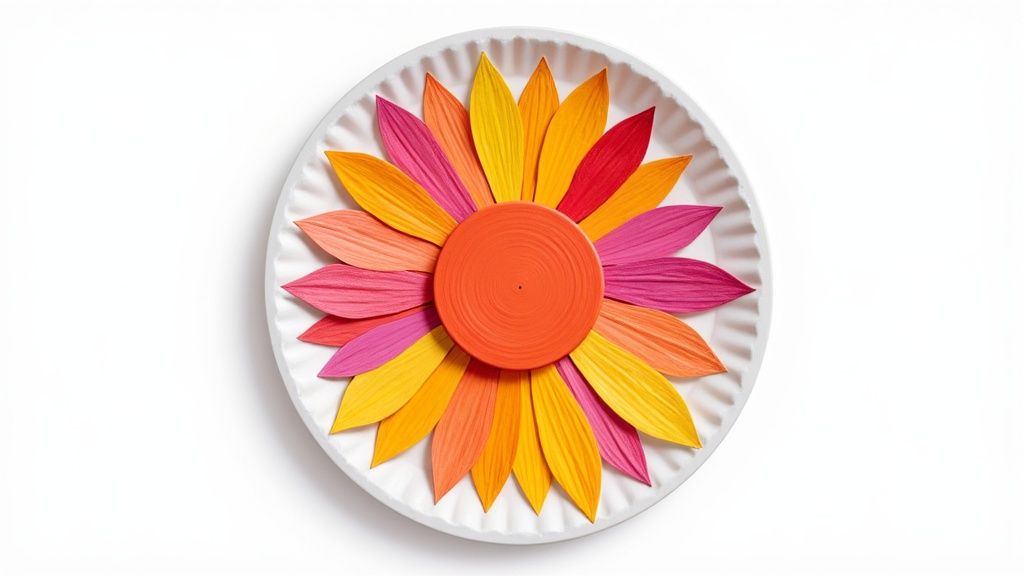
A timeless classic in the world of spring arts and crafts for preschoolers, the paper plate flower is a wonderfully simple yet versatile project. This activity involves transforming a humble paper plate into a vibrant bloom, which serves as a perfect canvas for a child's creativity. The core idea is to use the circular plate as the flower's center and attach petals around its edge, offering a fantastic opportunity to develop fine motor skills through cutting, gluing, and painting.
This craft is ideal for introducing young children to the changing seasons and the beauty of nature. Its low-cost, high-impact nature makes it a favorite in various settings. For a practical example, daycare centers often use this craft for a sweet Mother's Day gift by attaching a photo of the child in the center. Community centers can create a stunning collaborative garden display by combining flowers made by many children.
Implementation and Tips
To get started, provide each child with a paper plate, scissors (safety scissors for them, or pre-cut petals for younger ones), glue, and various colorful materials. Construction paper, tissue paper, and paint are excellent choices for petals.
- Petal Preparation: For toddlers, pre-cutting petal shapes from colored paper saves time and frustration. Older preschoolers can practice their scissor skills by cutting out their own petal shapes, either freehand or by following a simple template.
- Coloring Advice: Use the center of the paper plate to explore color. For instance, paint the center yellow or brown to make a sunflower. An actionable tip is to mix a dot of white paint into your primary colors to create pastel spring shades. This teaches children how to create tints and softens the overall look of their flower.
- Creative Variations: Encourage kids to experiment. They can glue pom-poms or buttons in the center for texture, or use handprints as petals for a personal touch. To explore different types of blooms, you can find inspiration from these free flower coloring pages from colortada.com.
Key Insight: This activity is more than just a craft; it's a multi-sensory learning experience. Children engage with different textures (paper, paint, glue), practice hand-eye coordination, and make creative decisions about color and composition, all while celebrating the arrival of spring.
2. Butterfly Wing Painting (Symmetry Activity)
A magical and educational project, butterfly wing painting introduces preschoolers to the mathematical concept of symmetry in a fun, hands-on way. This craft involves folding a piece of paper in half, applying paint to one side, and then folding it again to create a perfectly mirrored image on the other side, revealing a beautiful, symmetrical butterfly. It’s a fantastic activity for demonstrating cause and effect while encouraging artistic expression.
This simple craft is highly effective in various educational settings. For example, Montessori schools use this project to make abstract concepts like symmetry tangible and understandable for young learners. As a practical application, a preschool teacher could create a vibrant classroom display titled "Our Symmetrical Spring" using butterflies made by each student.
Implementation and Tips
To begin, fold a piece of paper in half and have the child apply dabs of paint to one side of the fold. Gently press the clean half over the painted side to transfer the design.
- Paint Preparation: Use slightly thicker paint, like tempera, to prevent it from bleeding through the paper and to create a more defined print. Prepare small pots of 3-5 different bright colors to encourage vibrant and interesting patterns.
- Coloring Advice: Before folding, encourage your child to place a dot of yellow paint next to a dot of blue paint. Ask them, "What color do you think we'll see where they squish together?" This turns the activity into a hands-on experiment in color mixing, revealing green in the final print.
- Creative Variations: Once the paint is dry, bring the butterfly to life by adding googly eyes and pipe cleaner antennae. You can also cut out the butterfly shape and hang it against a window, allowing the spring light to shine through the colors.
Key Insight: This activity seamlessly blends art with STEM principles. As children create their butterfly, they are not just painting; they are engaging in a foundational geometry lesson, exploring reflective symmetry in a memorable and visually rewarding way that connects directly to patterns found in nature.
3. Seed Planting in Eggshell Containers
This hands-on, eco-friendly project perfectly merges art with science, making it an unforgettable spring arts and crafts experience for preschoolers. The activity involves using carefully cracked eggshell halves as miniature, biodegradable pots for planting real seeds. It offers a tangible connection to nature's life cycles and teaches young children about growth, nurturing, and responsibility in a simple, accessible way.
This craft is a powerful educational tool that brings lessons about biology and sustainability to life. For a practical classroom example, a teacher could create a "greenhouse" on a sunny windowsill using the egg carton as a holder for each child's planter. This allows for easy watering and daily observation of the seedlings' progress.
Implementation and Tips
To begin, you'll need clean, empty eggshell halves (cracked carefully near the top), potting soil, seeds, and decorating materials. An egg carton makes an excellent, stable holder for the finished planters.
- Decorating Advice: Before planting, let the children express their creativity by decorating the outside of the eggshells. Non-toxic markers, watercolors, or tempera paint work beautifully. An actionable coloring tip is to use markers to draw a funny face on the eggshell; later, the sprouting seeds will look like silly green hair.
- Seed Selection: Choose seeds that germinate and grow quickly to maintain a preschooler's interest. Beans, peas, cress, or simple herbs like basil are excellent options that will sprout in just a few days.
- Care and Observation: Create a simple "seed care chart" with pictures to help children remember to water their plant. Document the growth with weekly photos to create a class book, visually tracking the journey from seed to sprout. For the best results, to ensure your little ones' eggshell seedlings thrive, check out these 10 tips for successful sowing and germination.
Key Insight: This craft teaches more than just planting; it fosters a sense of stewardship and patience. As children care for their tiny seedling and watch it grow, they develop an early appreciation for the natural world and their role in protecting it. Once the seedling is large enough, the entire eggshell can be planted directly into the ground, as it will naturally decompose and nourish the soil.
4. Tissue Paper Suncatchers
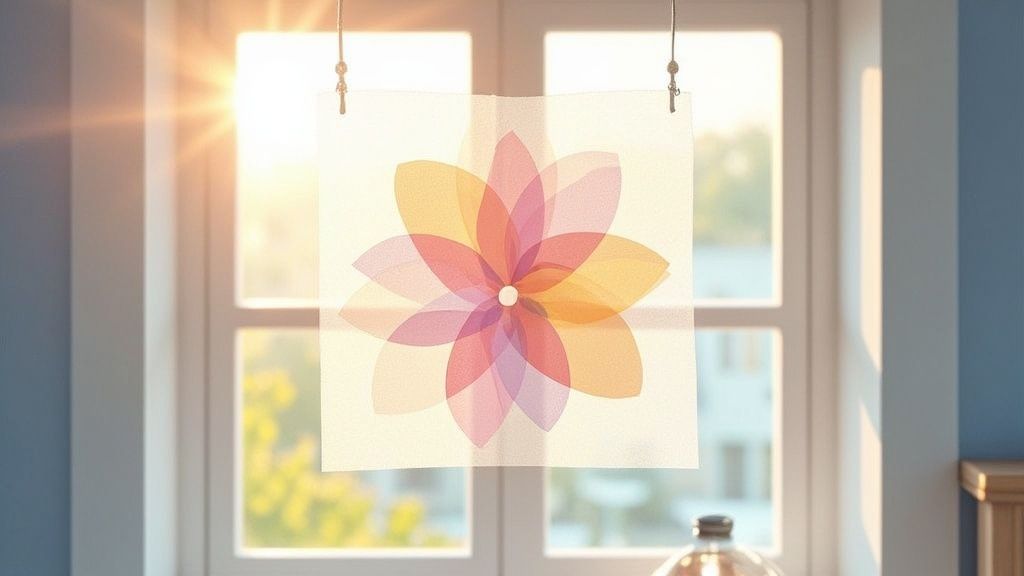
A delightful way to capture the vibrant light of spring, tissue paper suncatchers are a magical craft for preschoolers. This activity involves arranging colorful, translucent tissue paper pieces onto a sticky or clear surface to create beautiful designs. When hung in a window, these creations catch the sunlight, casting a stunning mosaic of colors into the room and offering a simple, hands-on lesson in light and color theory.
This craft is incredibly versatile and well-suited for group activities. As a practical example, a library could host a spring-themed story time and follow it with this craft, allowing children to create suncatchers shaped like characters from the book (e.g., a butterfly or a flower). The process of tearing and placing the paper is excellent for developing pincer grasp and fine motor coordination.
Implementation and Tips
To begin, you'll need clear contact paper, colorful tissue paper, and scissors. Create a simple frame from cardstock or just use two sheets of contact paper. Peel the backing off one sheet, lay it sticky-side up, and let the children arrange the tissue paper on it before sealing it with the second sheet.
- Paper Preparation: For very young children, pre-tear the tissue paper into small, manageable squares or strips. Older preschoolers can work on their tearing skills, which is a great pre-scissor activity that strengthens hand muscles.
- Coloring Advice: This craft is a perfect opportunity to teach color mixing. Encourage children to overlap different colors of tissue paper, like blue and yellow, to see how they create a new color (green) when the light shines through. Make it a game: "Let's see if we can make purple by overlapping red and blue!"
- Creative Variations: Create frames in the shape of spring symbols like flowers, butterflies, or raindrops. For a more durable craft, you can laminate the finished suncatchers. If a sunny window isn't available, placing the finished project on a light box provides a similar beautiful effect for indoor viewing.
Key Insight: Tissue paper suncatchers offer a unique sensory experience that combines sight and touch. Children learn about transparency, light refraction, and color properties in a playful and artistic way, transforming a simple window into a dynamic, colorful canvas that changes with the light of day.
5. Nature Collage with Spring Items
A wonderful way to connect preschoolers with the season, a nature collage uses the outdoors as an art supply store. This activity encourages children to explore their environment, gathering natural spring materials like new leaves, delicate flowers, small twigs, and blades of grass to create a unique, textured piece of art. Gluing these found objects onto paper or cardboard celebrates spring’s natural abundance while enhancing sensory awareness and developing fine motor skills.
This craft is highly valued in educational settings that prioritize hands-on, nature-based learning. For a practical example, a Forest School leader could give each child a piece of double-sided tape on a card, and as they walk, they stick small, found items directly onto it, creating a "nature bracelet" or "journey stick" collage that tells the story of their walk.
Implementation and Tips
The project can begin with a guided nature walk where children collect their materials in a small bag or basket. Provide a sturdy base like cardboard or thick paper and clear-drying glue.
- Item Preparation: For a flatter, longer-lasting collage, press flowers and leaves between the pages of a heavy book (with newspaper to protect the pages) for a day or two before gluing. This helps them adhere better and preserves their color.
- Coloring Advice: While nature provides the color, you can enhance the project by providing a uniquely colored background. An actionable tip is to have children do a watercolor wash on their paper first. For instance, a light blue wash for the "sky" before gluing on twigs to make a tree. This adds a layer of artistic intent to the project.
- Creative Variations: Encourage thematic sorting before gluing. Children can create a collage using only green items, focus on arranging items by size, or create a scene like a forest floor. You can also provide a simple outline of a spring animal, like a butterfly or rabbit, for them to fill in with their natural treasures.
Key Insight: This activity extends beyond simple crafting; it's an exercise in observation and mindfulness. As children search for materials, they learn to notice the small details of the natural world, fostering a deeper appreciation for their environment and the specific signs of spring.
6. Handprint and Footprint Spring Animals
A cherished and personal approach to spring arts and crafts for preschoolers, this activity uses a child’s own handprints and footprints as the foundation for creating adorable spring animals. This craft turns a simple print into a butterfly, bird, lamb, or caterpillar, offering a beautiful way to capture a moment in time while celebrating the season's new life. It's a fantastic sensory experience that results in a unique and memorable keepsake.
This craft is particularly popular for creating personalized gifts and decorations. As a practical example, a preschool class could create a large mural of a pond scene, using each child's blue handprints for "water" and their yellow footprint "ducks" swimming on top. This turns individual art into a collaborative masterpiece.
Implementation and Tips
To begin, you'll need paper, washable non-toxic paint, and markers or other small craft supplies for details. Prepare a workspace that’s easy to clean, and have wet wipes on hand for quick clean-ups between prints.
- Printing Process: Use a foam brush to apply a thin, even layer of paint to the child’s hand or foot. Press it firmly onto the paper and lift straight up to avoid smudging. For a cleaner alternative, ink pads work wonderfully and dry faster.
- Coloring Advice: For a handprint butterfly, paint one side of the palm pink and the other purple before pressing. When the handprint is made twice (once with each hand), it creates beautiful, multi-toned wings. After it dries, use a black marker to draw the body and antennae right down the middle.
- Creative Variations: Turn four red handprints into a ladybug, a yellow footprint into a duckling, or a white handprint into a fluffy lamb by adding cotton balls for wool. For more ways to enhance this activity, you can explore these fine motor skills activities from colortada.com. Laminating the final artwork helps preserve these precious keepsakes for years.
Key Insight: This activity is deeply personal and builds a child's sense of self-identity. Seeing their own hand or foot transform into a creature is magical for a preschooler, connecting them physically to their creation and boosting their confidence while celebrating their uniqueness.
7. Rainbow Rain Stick or Sensory Bottles
A fantastic multisensory project, the rainbow rain stick or sensory bottle combines visual appeal with auditory exploration. This craft involves layering colorful materials like dyed rice, beads, or small pasta inside a clear container to create a stunning visual effect and a soothing sound. It’s an excellent spring arts and crafts for preschoolers activity that teaches cause-and-effect as children connect their actions (tilting the bottle) with the resulting sound.
This craft is highly adaptable and valued in various educational settings. For a practical application, these can be used during circle time to signal a transition. The teacher can say, "When the sound of the rain stick stops, it will be time to clean up." This provides a gentle, auditory cue that is more calming than a loud timer.
Implementation and Tips
To begin, you will need clear plastic bottles (or sturdy cardboard tubes), and a variety of small, dry materials. Dried rice, lentils, small beans, beads, and tiny pasta work wonderfully. Funnels can also help preschoolers fill their bottles with less mess.
- Coloring Advice: Create vibrant spring colors by dyeing your materials beforehand. Place rice or pasta in a sealable bag, add a few drops of food coloring and a splash of vinegar, then shake until evenly coated. Spread the colored materials on a tray to dry completely before use. To make it a coloring activity, have children color the plain rice with washable markers before putting it in the bottle.
- Layering for Sound and Sight: Encourage children to create patterns by layering different materials. A layer of fine rice will sound different from a layer of larger beans. This variation in size and weight creates a more complex and interesting sound. For a visual treat, add glitter or tiny sequins between layers.
- Safety First: Once the bottle is filled, it's crucial to secure the lid. Apply a strong adhesive like hot glue or superglue to the inside of the cap before screwing it on tightly. This ensures the contents remain safely inside during play.
- Thematic Fun: Connect the craft to spring by using a pastel color palette or layering materials in a rainbow sequence. You can find more ideas to engage the senses by exploring these sensory activities for preschoolers from colortada.com.
Key Insight: This activity is a powerful tool for sensory development. It engages sight, sound, and touch, helping children process sensory information in a fun and controlled way. The act of creating the bottle itself hones fine motor skills, while the finished product serves as a lasting resource for play and emotional regulation.
8. Spring Tree Painting with Blossoms (Process Art)
Spring tree painting is a beautiful process-oriented activity that emphasizes creative exploration over a perfect final product. This craft invites preschoolers to represent the season's awakening by first painting tree trunks and bare branches, then using various materials to add vibrant blossoms. It’s a fantastic way for children to experiment with different painting techniques and textures, making each creation uniquely their own.

This approach is highly valued in educational settings that prioritize child-led discovery. For a practical example, instead of paintbrushes for the tree trunk, give children a straw to blow brown, watery paint across the paper. This creates a realistic, branching effect that is both fun and develops breath control.
Implementation and Tips
Start by providing paper and brown or black paint for the tree trunks. Once the trunks are painted, set up a "blossom station" with various tools and paints. This setup allows children to fully direct their own creative process.
- Tool Preparation: Arrange different materials in separate, easily accessible containers. Cotton balls, small sponges, bubble wrap, and pom-poms are excellent for creating different blossom effects. A fantastic, low-cost tool is a recycled plastic bottle; the bottom makes a perfect flower-shaped stamp.
- Coloring Advice: Offer a palette of spring colors like pastel pinks, purples, and bright yellows. Pour small amounts of paint onto paper plates. For a more realistic blossom effect, place a dab of white paint next to a dab of pink paint. When the child dips their cotton ball or sponge, they will pick up both colors, creating a beautiful, variegated look on the branches.
- Creative Variations: Demonstrate how to dab with a sponge or stamp with bubble wrap to create texture, then step back and let the children explore. Play soft, spring-themed music to create a calm and inspiring atmosphere. Displaying the finished trees together can create a wonderful collaborative forest mural.
Key Insight: This process art activity empowers children by focusing on the "doing" rather than the "end result." It teaches them that there is no single "right" way to create, fostering artistic confidence, decision-making skills, and an appreciation for their own unique creative instincts.
8 Spring Preschool Crafts Comparison
| Activity | Implementation Complexity 🔄 | Resource Requirements ⚡ | Expected Outcomes ⭐ / 📊 | Ideal Use Cases 💡 | Key Advantages ⭐ |
|---|---|---|---|---|---|
| Paper Plate Flower Crafts | Low 🔄 — simple steps, quick setup | Very low ⚡ — paper plates, paint, tissue paper | ⭐ Fine motor & color recognition; 📊 quick visible results | Classroom centers, quick art sessions, Mother's Day gifts | Budget-friendly, minimal prep, easily displayed |
| Butterfly Wing Painting (Symmetry Activity) | Low–Moderate 🔄 — timing-sensitive (wet paint folding) | Low ⚡ — paper, tempera/paints | ⭐ Teaches symmetry & cause-effect; 📊 striking results | Math-art integration, symmetry lessons, hallway displays | Impressive outcomes with little skill; integrates science/math |
| Seed Planting in Eggshell Containers | Moderate 🔄 — prep shells + ongoing care | Low–Moderate ⚡ — eggshells, soil, seeds, watering supplies | ⭐ Plant growth learning & responsibility; 📊 long-term engagement | Garden units, Earth Day activities, long-term observation | Teaches sustainability; living, biodegradable results |
| Tissue Paper Suncatchers | Low 🔄 — simple assembly, some prep | Very low ⚡ — tissue paper, contact paper/clear base | ⭐ Color & light exploration; 📊 high visual impact when backlit | Window displays, color/light lessons, seasonal décor | Vibrant backlit results; minimal mess; reusable frames |
| Nature Collage with Spring Items | Moderate 🔄 — collection + assembly, weather-dependent | Minimal ⚡ — found natural materials, glue, paper | ⭐ Observation & sensory skills; 📊 unique textured artwork | Outdoor learning, environmental education, nature walks | Free materials; fosters nature connection and exploration |
| Handprint and Footprint Spring Animals | Low–Moderate 🔄 — messy but straightforward process | Low ⚡ — washable paint, paper, wipes | ⭐ Personalized keepsakes & motor skills; 📊 high engagement | Keepsake projects, family gifts, growth documentation | Highly motivating; simple supplies; high success rate |
| Rainbow Rain Stick or Sensory Bottles | Moderate 🔄 — layering technique + secure sealing | Low–Moderate ⚡ — clear bottles/tubes, dried materials, sealant | ⭐ Multisensory regulation & sound exploration; 📊 durable tool | Sensory corners, calm-down activities, music exploration | Multisensory, long-lasting, calming when used properly |
| Spring Tree Painting with Blossoms (Process Art) | Moderate 🔄 — multiple materials and stations | Moderate ⚡ — paints, cotton, sponges, stamps, tools | ⭐ Creative exploration & technique practice; 📊 attractive group displays | Process-art sessions, art therapy, collaborative murals | Encourages experimentation; supports diverse abilities and expression |
Keep the Springtime Creativity Blooming All Season
As the days grow longer and the world outside bursts with color, you now have a treasure trove of eight engaging projects to channel that vibrant energy. From the simple joy of creating paper plate flowers to the sensory exploration of a rainbow rain stick, these spring arts and crafts for preschoolers are designed to do more than just fill an afternoon. They are stepping stones for growth, blending fine motor skill development with lessons in science, nature, and creative expression.
We’ve explored how a simple symmetry activity with butterfly wing painting can introduce foundational math concepts and how planting seeds in eggshells offers a tangible connection to the life cycle. Each project, whether it's the process-art freedom of painting spring tree blossoms or creating a personal nature collage, serves as a powerful tool for learning through play. The key takeaway is to embrace the process over the final product. A smudged handprint sheep or a crooked suncatcher is a badge of honor, representing a moment of discovery and focused effort for your little artist.
Maximizing the Creative Experience
To make these activities truly impactful, remember to focus on the sensory details. Discuss the textures of the leaves in the nature collage, the sound the rain stick makes, and the feel of the cool paint on their fingertips. This approach transforms a simple craft into a multi-sensory learning experience.
- Adapt and Customize: Don't be afraid to modify projects. If your preschooler loves glitter, add some to the butterfly wings. If they are fascinated by bugs, turn the handprint animals into ladybugs and caterpillars.
- Talk About the Art: Ask open-ended questions like, "Tell me about the colors you chose for your flower," or "What was your favorite part of making this?" This builds vocabulary and validates their creative choices.
- Integrate Coloring: For a quiet transition after a hands-on project, offer spring-themed coloring pages. This is a great way to reinforce color recognition and practice pencil grip. Advise them to try layering colors, like putting a light yellow down before adding a darker green on a leaf, to create more depth and dimension.
Creating a Space for Ongoing Inspiration
The best way to encourage consistent creativity is to make materials accessible and inviting. To keep the crafting fun going year-round, maintaining an organized and inspiring creative space is crucial. A well-ordered area with clearly labeled bins for crayons, paper, and craft supplies empowers children to initiate their own projects. For practical strategies and ideas, consider these tips on organizing your playroom for creative play. By creating a dedicated and functional art zone, you send a clear message that creativity is valued in your home or classroom.
Ultimately, these spring arts and crafts for preschoolers are about creating joyful memories. They are about the shared laughter, the "aha!" moments, and the pride your child feels when they hold up their finished creation. Embrace the mess, celebrate the effort, and watch as these simple activities help your child’s imagination bloom right alongside the springtime flowers.
Ready to extend the creative fun? Explore thousands of beautiful, high-quality spring-themed coloring pages at Colortada. From blooming gardens to baby animals, Colortada offers the perfect designs to complement your hands-on crafts and provide endless hours of artistic enjoyment.
