When it comes to getting melted crayon out of a dryer, the game plan is pretty straightforward. You’ll first need to scrape off the bigger, hardened chunks of wax. Then, an oil-based solvent like WD-40 comes in to break down what's left. Finally, a good wipe-down and a "sacrificial" load of old rags will take care of any lingering residue. It’s a simple, three-part process that tackles both the waxy buildup and the colorful stains left behind.
The Melted Crayon Laundry Nightmare
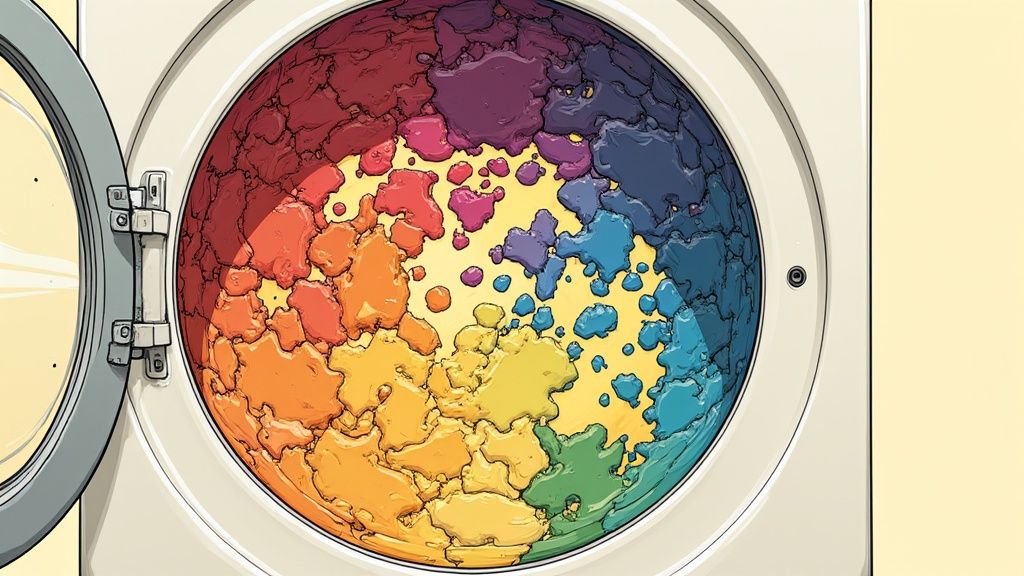
We’ve all been there. You open the dryer door, expecting a load of warm, clean clothes, only to be met with a waxy, colorful catastrophe. A Jackson Pollock-style explosion of melted crayon coats the inside of the drum and, even worse, your family's laundry. It’s a classic, frustrating moment for any parent.
This isn't just a simple mess. You're dealing with a stubborn combination of wax and pigment that has literally been baked onto the metal drum and your fabrics.
Trust me, you’re not alone in this. While it's hard to find exact numbers, laundry experts from brands like Maytag confirm it’s a constant issue they hear about, especially from families with kids between 2 and 10 years old.
From Creative Fun to Laundry Crisis
It’s amazing how quickly a child's pocket-sized work of art can turn into a laundry disaster. A single stray crayon is all it takes to smear vibrant, waxy color all over the dryer drum and embed itself deep into the fibers of your clothes.
But don't panic. This guide is here to walk you through a proven, practical solution. First, we'll focus on cleaning the crayon out of the dryer drum itself. Then, we’ll move on to rescuing the stained clothes.
We'll start by gathering the right tools for the job and then dive into a step-by-step method to get your dryer back in action, fast.
A Quick Tip to Save Your Sanity: To stop this from happening again, give your little artist a dedicated "art smock" or old t-shirt to wear. Get into the habit of checking its pockets before it ever hits the laundry hamper. A little prevention now can save you from a major cleanup later.
Gathering Your Crayon Removal Toolkit
Before you dive in and start scrubbing, getting your supplies in order will make tackling that melted crayon mess a whole lot easier. Trust me, having everything within arm's reach saves you from running around mid-cleanup. Think of this as your mission prep.
First things first: safety is paramount. Before you even think about cleaning, unplug your dryer completely. It’s a simple step, but it’s the most important one to prevent any risk of electric shock. It's also a good idea to crack open a window or get a fan going for ventilation, especially since you'll be working with cleaners.
Essential Cleaning Supplies
You won't need a professional cleaning crew, but a few specific items are non-negotiable for getting the job done right without damaging your dryer.
- A plastic scraper: An old credit card, a gift card, or a plastic putty knife is perfect. It needs to be sturdy enough to pop off the hardened wax but soft enough that it won't scratch up the inside of your dryer drum.
- A solvent: This is what will break down that stubborn, waxy residue. WD-40 is a classic for a reason—the oil in it cuts right through the paraffin wax in crayons, making it simple to wipe away.
- Melamine foam eraser: You probably know this as a Magic Eraser. It’s your secret weapon for lifting those faint color stains that often get left behind after the wax is gone.
- Clean cloths or paper towels: You'll go through a bunch of these. They’re essential for applying the solvent and, more importantly, for wiping out all the colorful gunk you dissolve.
This quick visual guide sums up the whole process nicely.
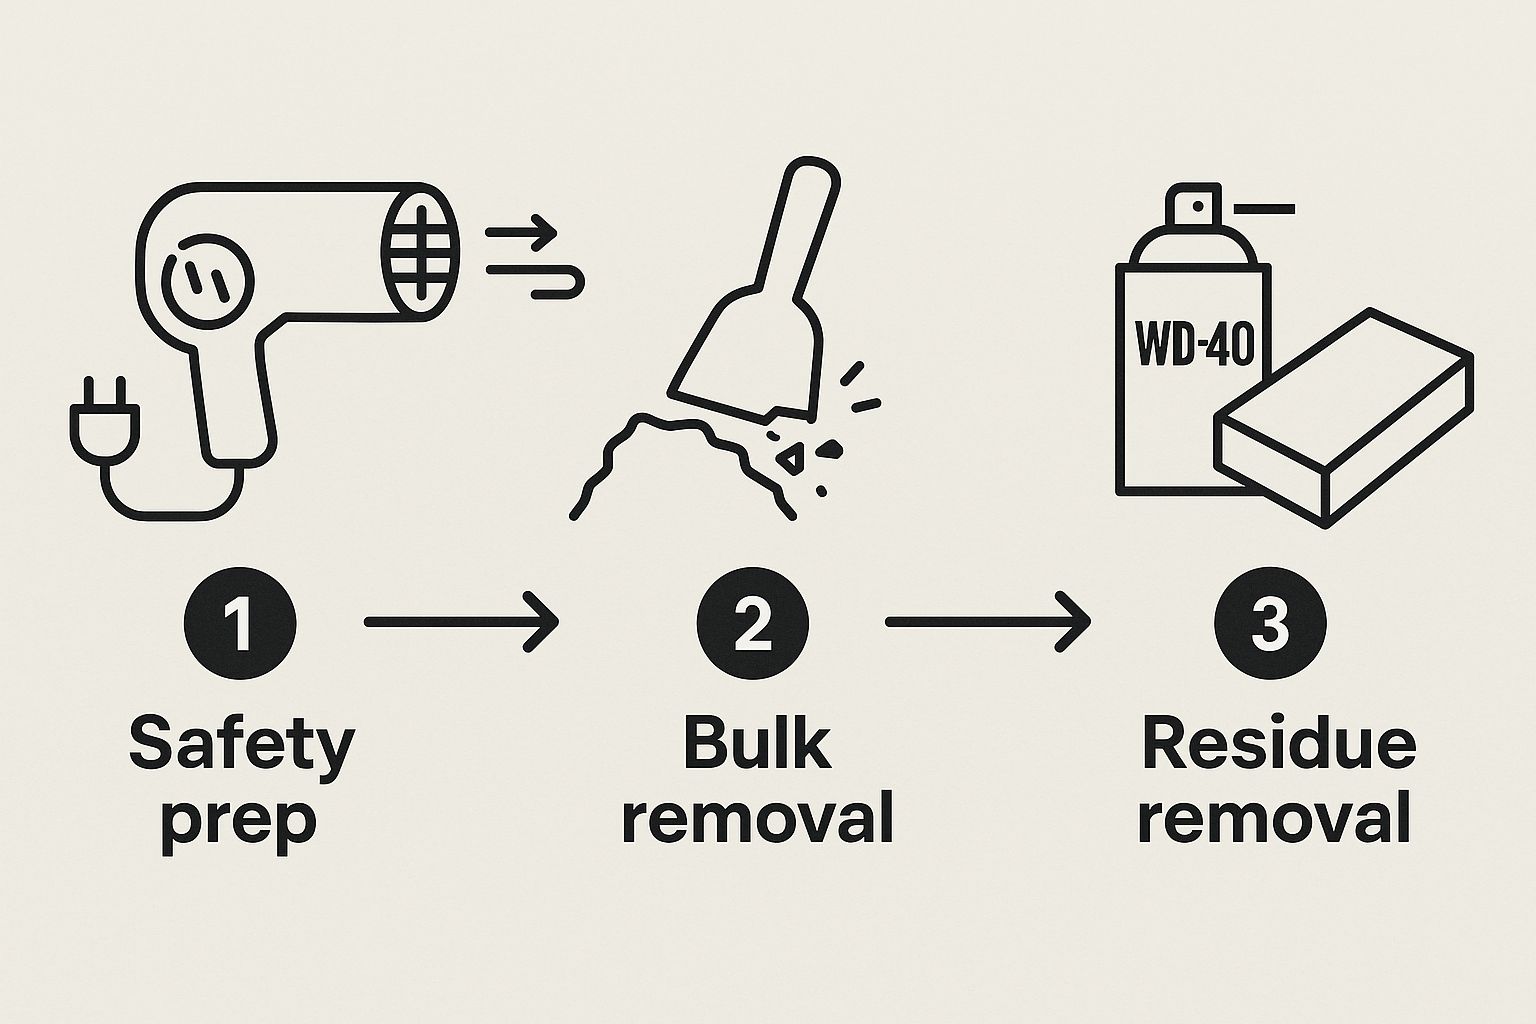
As the infographic shows, it’s a logical flow: start with safety, move to scraping the big chunks, and finish by dissolving the residue. Simple, effective, and gets your dryer back in business.
Here’s a quick-reference table of everything you'll need. Gather these essentials to safely and effectively remove melted crayon wax from your dryer drum.
Your Crayon Cleanup Toolkit
| Item | Purpose | Pro Tip |
|---|---|---|
| Plastic Scraper | Lifts off large, hardened chunks of crayon wax. | An old credit card or plastic putty knife works perfectly without scratching the drum. |
| WD-40 | Dissolves the oily, waxy crayon residue. | Spray it on a cloth, not directly into the dryer, to control where it goes. |
| Melamine Eraser | Removes any lingering color stains from the drum. | Dampen it slightly with water for the best results on tough spots. |
| Old Rags/Towels | Applying solvent and wiping away the melted mess. | Have a trash bag handy to toss the waxy rags as you go. |
| Soap and Water | Cleans off any remaining solvent or cleaning residue. | A simple mix of dish soap and warm water does the trick. |
Having these items ready to go will make the entire process much smoother and ensure you get a truly clean finish.
Cleaning Crayon From the Dryer Drum
Alright, with your supplies in hand, it's time to face that waxy, colorful mess inside your dryer. This is where the real work begins, but don't worry—with the right approach, you can get your dryer drum looking brand new again. The absolute first rule: always start with a completely cold and unplugged dryer. Safety first.
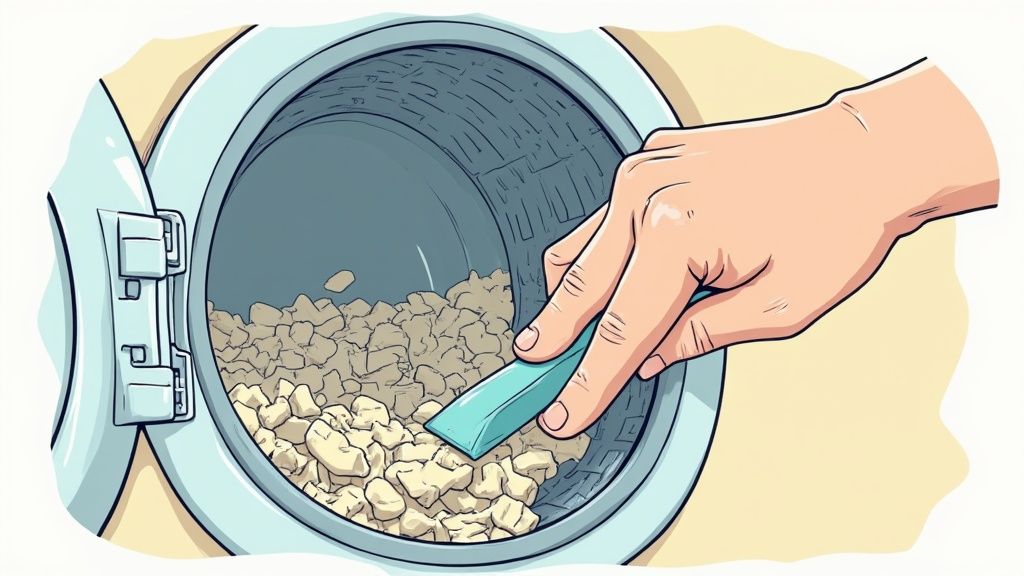
Your first job is to get rid of the big stuff. Grab a plastic scraper or even an old credit card and start gently chipping away at the larger, hardened blobs of crayon. For example, if there's a big, thick smear of blue crayon on the back of the drum, focus on that first. The goal here is just to remove as much of the solid wax as you can without scratching the drum. Take your time and work methodically.
Dissolving the Waxy Residue
After you've scraped off the major chunks, you’ll be left with colorful streaks and a waxy film. This is where your secret weapon, an oil-based solvent like WD-40, comes in. Lightly spray a clean cloth with it—never spray WD-40 directly into the dryer drum, as the aerosol is flammable.
Now, start wiping down the waxy areas. You'll see the oil almost immediately start to break down and dissolve the crayon, making it much easier to wipe away. As your cloth fills up with melted crayon, swap it for a clean one so you aren't just smearing the mess around. Make sure to get into all the nooks and crannies, including the dryer paddles.
Even the pros at Crayola back this kind of strategy. Their official advice starts with wiping up the melted wax, which they estimate can get about 50-60% of it. They also found that following up with a Mr. Clean Magic Eraser removes 85% of what's left, giving most people a 90% success rate. You can find more tips in the official Crayola stain removal guide.
Finishing with a Final Polish
If some stubborn color stains are still hanging on after the WD-40 treatment, the Mr. Clean Magic Eraser is perfect for the final touches. Just dampen it slightly and its micro-scrubbers will lift the pigment without damaging the drum. Gently rub the spots until the color is gone.
Final Cleanup Run: To make absolutely sure no oily residue is left to ruin your next load of clothes, you need to run a "sacrificial" load. Just toss a few old, damp rags into the dryer and run it on a warm cycle. These rags will soak up any leftover solvent, leaving your dryer drum spotless and ready for your actual laundry. This step is non-negotiable.
How to Salvage Crayon-Stained Clothes
Okay, with the dryer drum looking brand new, let's tackle the real casualties: the clothes. I know it’s frustrating to see waxy streaks all over a favorite shirt, but don't give up on it just yet. Most of the time, you can bring these garments back from the brink.
The most important rule? Do not rewash the clothes. That's the first instinct for many, but the heat will just set the stains, making them a permanent fixture.
Breaking Down the Wax and Pigment
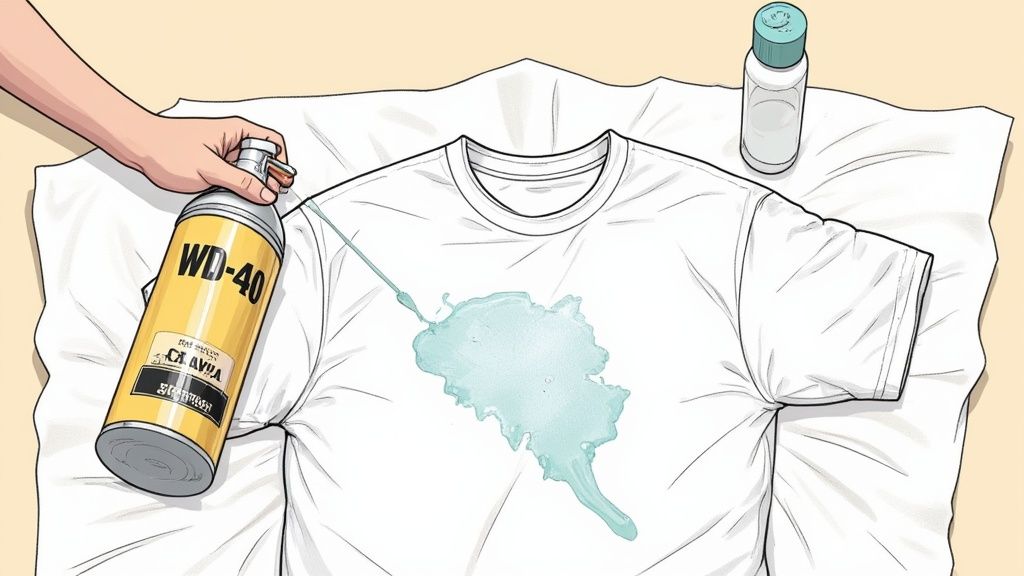
First, grab the stained item and lay it face down on a thick stack of clean paper towels. The idea is to pull the crayon out of the fabric, not drive it deeper. For example, if a yellow crayon left a streak on the sleeve of a cotton t-shirt, place the sleeve streak-down onto the paper towels.
Now, take your can of WD-40 and give the back of the stained area a light spray. The oils in the spray immediately start to break down the wax, and you'll see it begin to transfer onto the paper towels underneath.
This part requires a little patience. As the paper towels soak up the colorful wax, you’ll need to swap them out for fresh ones. Just keep repeating this process until no more color is coming out. If you want to dive deeper into this method, we have a complete guide right here: https://www.colortada.com/blog/post/how-to-get-crayons-out-of-clothes
Tackling the Oily Aftermath
After the crayon color is gone, you'll be left with a faint, oily-looking spot from the WD-40. Don't worry, that's expected. This is where a trusty grease-fighting dish soap, like Dawn, becomes your hero.
- Apply the Soap: Squeeze a small amount of the dish soap directly onto the oily patch.
- Work it In: Gently rub the soap into the fibers using your fingers or a soft brush.
- Let it Sit: Give the soap at least 15-20 minutes to really break down the oil.
Once it's had time to sit, go ahead and wash the clothing in the hottest water the care tag allows. This final wash should get rid of the soap and any last traces of the stain.
The Most Important Final Step: Whatever you do, do not put the garment in the dryer until you are 100% sure the stain is gone. Let it air-dry completely first. If even a faint hint of the crayon is left, the dryer's heat will set it for good.
For more general tips, check out this practical guide on how to remove stains from clothes. Remember, acting fast is key. Industry tests have shown that treating crayon stains right away is successful in up to 75% of cases before the stain has a chance to fully set.
Preventing the Next Crayon Calamity
Let’s be honest, the easiest way to deal with a crayon-in-the-dryer disaster is to make sure it never happens again. A little bit of prevention goes a long way and saves you from another afternoon of scrubbing waxy streaks.
Your first and best line of defense is a simple family rule: the mandatory "pocket check." Before anything hits the laundry basket, every single pocket needs to be emptied. This one habit alone will stop most crayons in their tracks.
Smart Coloring Habits
If you have a budding artist at home, set them up for success. Designate an old t-shirt or a special "art smock" they have to wear when they're coloring. That way, you only have one key item to inspect for rogue crayons instead of their entire wardrobe.
It’s also worth looking into washable crayons for everyday masterpieces. They're made to dissolve in the wash, so if one does sneak past your defenses, the cleanup is infinitely less dramatic.
Actionable Coloring Advice: Encourage kids to put their crayons back in the box when they're done. You can make this a fun cleanup game by asking them to match the crayons to the colors on the box. For younger artists, consider chunkier, triangular crayons that are less likely to roll off a table and into a hidden pocket.
Getting your craft area in order can be a game-changer. For some great ideas, check out our guide on how to organize craft supplies.
While we're on the topic of dryer care, remember this goes beyond just crayons. Regular maintenance is key for safety, especially when it comes to preventing dryer lint fire hazards, which is a serious risk you don’t want to ignore.
A Few Final Tips for Crayon Cleanup
Even after you've tackled the big mess, a few lingering questions might pop up. I get it. You want to be sure the job is done right. Let's walk through some common concerns I've heard from people over the years.
First up, that smell. A burnt crayon has a very distinct, waxy scent that can hang around. Don't worry, this is normal. Once you've done a full cleaning with the WD-40 and followed up with soapy water, that final load of old rags really does the trick. It soaks up any last bits of residue and takes the smell with it. Just make sure you crack a window while you're working to keep the air moving.
Tackling Those Stubborn Spots
Inevitably, you'll find tiny specks of melted crayon lodged in the dryer drum's little vent holes. This is where you need a bit of precision. A simple toothpick or a straightened paper clip works wonders here. Just gently poke and pry the wax out of the holes, then give the area a quick wipe with a WD-40-dampened cloth to finish it off. For example, if you see a fleck of red crayon stuck in a vent hole, carefully use the tip of a paperclip to lift it out.
Now, let's talk about what not to do, because this is important. It can be tempting to grab something stronger like acetone, nail polish remover, or even rubbing alcohol. Please don't. These chemicals are highly flammable and have no place inside a machine that generates heat. The fumes alone are dangerous, and they can easily damage the enamel finish on the dryer drum.
Stick with oil-based products to dissolve the wax and a simple detergent to clean up afterward. This approach is safe and effective for your dryer, but the principle works elsewhere, too. If you've got a waxy masterpiece on another surface, check out our guide on how to get crayon off walls for some similar techniques.
Taking care of these final details ensures your dryer isn't just clean, but truly ready and safe for your next load of laundry. A little patience and the right tools make all the difference.
At Colortada, we know that creativity can sometimes get messy. Find your child’s next artistic adventure with our endless collection of free coloring pages at https://www.colortada.com.
